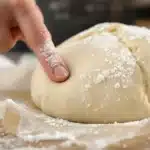
You’ve meticulously measured your ingredients, carefully mixed your batter, or patiently kneaded and proofed your dough. Now comes the final transformation, the fiery crucible where raw potential becomes delicious reality: the oven. For many home bakers, the oven is simply a hot box turned to a specific temperature. We preheat, slide our creations inside, set a timer, and hope for the best. But what if your results are inconsistent – cakes doming and cracking, cookies burning on the bottom but pale on top, bread failing to rise dramatically? Often, the overlooked variable is the oven itself.
Your oven isn’t just passive equipment; it’s an active partner in the baking process. Understanding how it works, recognizing its unique personality, and learning how to manage its heat effectively can be the difference between frustrating failures and consistent triumphs. It’s time to move beyond simply setting the dial and gain some crucial “oven insights.” Let’s explore the science of oven heat, demystify common features and quirks, and learn how to work with your oven to achieve baking brilliance.
The Hot Box: How Your Oven Works
At its core, an oven is an insulated container designed to heat food using controlled thermal energy. Whether powered by gas or electricity, it uses heating elements to raise the internal temperature and then cycles those elements on and off to maintain (ideally) the set temperature. But how does that heat actually cook your food? Baking relies on three fundamental modes of heat transfer happening simultaneously:
- Radiation: This is heat traveling in waves directly from a hot source to the food, much like the warmth you feel from the sun or a campfire. In an oven, the hot heating elements and the hot oven walls radiate heat directly onto the surface of your baked goods. This is a major contributor to browning and crust formation.
- Convection: This is heat transferred through the movement of fluids (in this case, hot air). As the air inside the oven heats up, it becomes less dense and rises, while cooler air sinks, creating natural convection currents. Some ovens use a fan (forced convection) to actively circulate this hot air much more efficiently. Convection helps distribute heat throughout the oven cavity and cooks food more evenly and often faster.
- Conduction: This is heat transferred through direct physical contact. The hot oven rack heats the baking pan, and the hot pan then transfers heat directly to the bottom of the dough or batter it’s holding. This is crucial for cooking the bottom of your bake and contributing to bottom crust formation.
A successful bake relies on a balance of these three heat modes. Radiation browns the top, convection cooks evenly, and conduction ensures the bottom isn’t raw. Understanding this interplay helps diagnose issues like burnt bottoms with pale tops, or vice-versa.
Oven Archetypes: Understanding Different Types
While professional bakeries use specialized ovens, most home kitchens feature one of these common types:
Conventional Ovens (Radiant / Still Ovens)
These are the traditional standard.
- Characteristics: Typically have heating elements located at the bottom of the oven cavity and sometimes a separate element at the top for broiling. They rely primarily on radiant heat from these elements and the hot oven walls, plus natural convection currents (the slow circulation of rising hot air and falling cooler air).
- Pros: Simpler design, generally less expensive. Can be better for delicate items like custards or some sponge cakes that might dry out too quickly with forced air circulation.
- Cons: Prone to significant hot spots (areas that are much hotter than others) and uneven temperature distribution. Often requires rotating pans halfway through baking to ensure even cooking and browning. May take longer to bake items compared to convection.
Convection Ovens (Fan Ovens / Fan-Assisted Ovens)
These ovens add a fan to improve heat circulation.
- Characteristics: Include a fan, usually mounted in the back wall, that actively circulates the hot air throughout the oven cavity. Many modern ovens offer both conventional (fan off) and convection (fan on) modes.
- Pros: Significantly more even temperature distribution, reducing hot spots. Generally bakes faster and promotes better browning and crisping due to the constant movement of hot air over the food’s surface. Great for roasting, multiple-rack baking, and achieving crisp cookie edges or well-browned bread crusts.
- Cons: The moving air can sometimes dry out the surface of very delicate items faster. Lightweight batters or papers (like meringues, macarons, cupcake liners) can occasionally be blown around by the fan. Recipes written for conventional ovens often need adjustments when baked using convection – typically reducing the temperature by about 25°F (15°C) and checking for doneness sooner (perhaps reducing baking time by 15-25%).
Deck Ovens (Brief Mention)
Though not typically home ovens, understanding them provides context for tools like baking stones.
- Characteristics: Feature thick stone or metal shelves (“decks”) heated intensely from both below and above. Used in professional pizzerias and bakeries.
- Benefit: Exceptional heat retention and powerful, direct bottom heat transfer (conduction), leading to characteristic crisp pizza crusts and excellent oven spring in breads. Home bakers mimic this with baking stones or steels.
The Preheating Imperative: Why Wait?
Almost every baking recipe begins with “Preheat your oven…” This step is absolutely critical and should never be skipped or rushed.
- Purpose: Preheating ensures that the oven air, walls, and racks reach the stable target temperature before your delicate dough or batter goes inside. Baking relies on immediate and consistent heat to work its magic.
- Why it Matters:
- Proper Rising: Yeast doughs need that initial blast of heat for “oven spring” – the rapid expansion of gases that gives bread its final lift. Chemical leaveners also rely on reaching the correct temperature quickly to activate fully. Starting in a cool oven leads to a slow, sluggish rise and dense results.
- Structure Setting: Heat is needed to set the structure by coagulating proteins (in eggs, flour) and gelatinizing starches. Insufficient initial heat can cause structures to collapse before they set.
- Texture & Browning: Proper heat ensures starches cook through, fats melt correctly (affecting spread in cookies, flakiness in pastry), and sugars caramelize/Maillard reactions occur for desirable browning and flavor. Starting cool leads to pale colors and potentially gummy textures.
- Preventing Issues: Starting cold can cause excessive spreading in cookies or melting in laminated doughs (like puff pastry) before the structure sets.
- How Long to Preheat: Don’t just wait for the oven’s indicator light or chime! That usually signals only that the air near the thermostat has reached the target temperature. The oven walls and racks take much longer to fully heat up and stabilize. Allow at least 15-20 minutes of preheating time after the indicator signal goes off. For baking stones or steels, allow 30-60 minutes or more. Thorough preheating ensures a stable, consistent baking environment.
Taming the Temperamental: Understanding Your Oven’s Quirks
Here’s a crucial insight: your home oven probably doesn’t bake exactly like your neighbor’s, or even exactly like the recipe developer’s. They often have inaccuracies and inconsistencies.
- Temperature Inaccuracy: The temperature you set on the dial might be significantly different from the actual temperature inside. It’s common for home ovens to be off by 25°F, 50°F (15-30°C), or even more! An oven consistently running too hot will burn exteriors before interiors are cooked; one running too cool will result in pale, dense, or under-baked goods.
- Hot and Cold Spots: Most ovens, especially conventional ones, have uneven heating patterns. Common hot spots are often near the back, close to heating elements, or on one particular side. This leads to uneven browning and cooking.
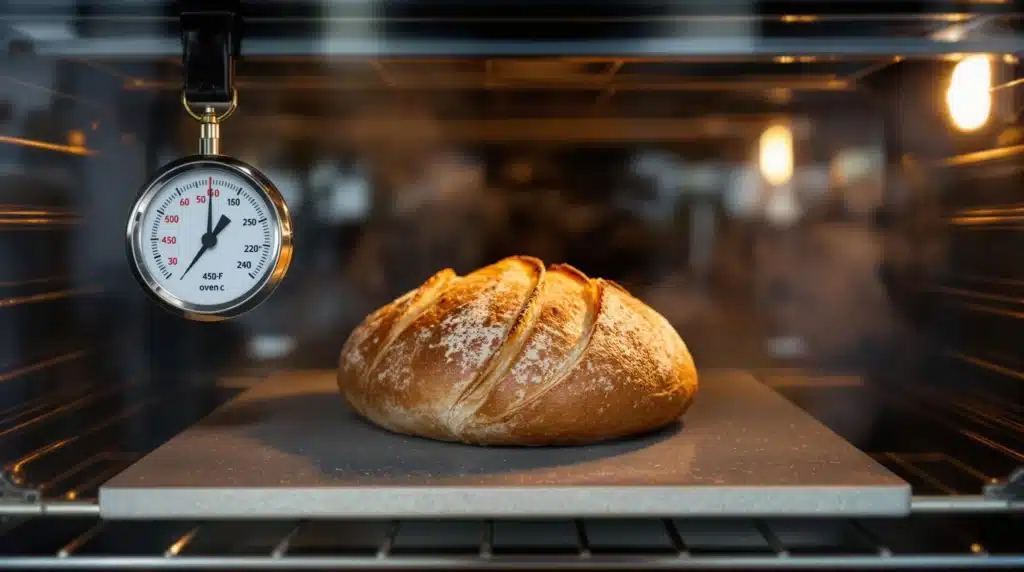
- The Essential Tool: An Independent Oven Thermometer: This inexpensive gadget is non-negotiable for serious bakers. Place it hanging from a central rack (or move it around to test different areas). Let the oven preheat thoroughly (at least 20-30 mins), then check the thermometer reading against your dial setting. If you set 350°F but it reads 325°F, you know you need to set your dial higher (e.g., 375°F) to achieve an actual 350°F. If it reads 375°F, you need to set your dial lower (e.g., 325°F). Always trust the independent thermometer over the oven dial.
- Mapping Your Oven: To find hot spots, place slices of plain white bread evenly across a baking sheet and bake at a moderate temperature (e.g., 350°F/175°C) until they start to color. The slices that brown first reveal your oven’s hottest zones. Alternatively, bake a batch of simple sugar cookies and observe the browning pattern.
- Managing Unevenness:
- Rotate Pans: For most cakes, cookies, and breads, rotate the baking pan(s) 180 degrees halfway through the baking time. If baking on multiple racks, swap their positions too. This helps compensate for hot spots.
- Choose Pans Wisely: Heavy-duty, light-colored metal pans (like aluminum) conduct heat evenly and absorb less radiant heat, reducing the risk of overly dark bottoms or edges compared to dark, thin pans. Glass and ceramic pans retain heat well but heat up more slowly; they may require temperature adjustments.
- Use a Baking Stone or Steel: These help moderate temperature fluctuations and provide even bottom heat.
The Power of Stone & Steel
Baking stones (made of ceramic, cordierite, or similar materials) and baking steels (heavy plates of conductive steel) are fantastic tools for improving oven performance, especially for breads and pizza.
- How They Work: Placed on an oven rack during the long preheating period, they absorb and store a tremendous amount of thermal energy. When you place dough directly on them (or a pan on top), they transfer this stored heat rapidly and evenly to the bottom via conduction.
- Benefits:
- Superior Oven Spring: The intense bottom heat helps yeast doughs rise dramatically in the oven.
- Crispier Bottom Crusts: Excellent for pizza, flatbreads, and rustic bread loaves.
- Temperature Stability: Their thermal mass helps buffer the oven against temperature drops when the door is opened or when cool dough is introduced.
- Usage: Require thorough preheating (allow at least 30-60 minutes at baking temperature). Typically placed on a rack in the lower third of the oven. Be careful handling them as they get extremely hot. Steel heats faster and transfers heat more intensely than stone.
Steam Secrets for Sensational Bread
For bakers aiming for artisan-style bread with a crackling, thin, beautifully browned crust (like sourdough or baguettes), introducing steam during the initial phase of baking is crucial.
- Why Steam Matters (First 10-20 minutes):
- Maximizes Oven Spring: Steam condenses on the cooler dough surface, keeping it moist and pliable for longer. This delays the setting of the crust, allowing the loaf maximum time to expand upwards from the heat before the crust hardens and restricts rising.
- Promotes a Shiny, Crisp Crust: The moisture from steam helps gelatinize starches on the dough’s surface. Later in the bake (after steam is removed), these gelatinized starches dry out and harden, contributing to a desirable thin, crisp, shiny, and deeply colored crust. Without steam, the crust forms too early, restricting rise and often resulting in a duller, thicker crust.
- Creating Steam Safely at Home: (Warning: Steam causes severe burns! Exercise extreme caution.)
- Dutch Oven / Combo Cooker (Easiest & Best): Baking bread inside a heavy, tightly lidded pot (like a cast iron Dutch oven or combo cooker) that has been preheated with the oven is the most effective method. The moisture evaporating from the dough itself gets trapped inside the pot, creating a perfect steamy environment. Remove the lid after 15-25 minutes to allow the crust to brown and crisp.
- Steam Pan Method: Place a sturdy metal pan (a cast iron skillet, a broiler pan, or even an old loaf pan – avoid glass!) on the bottom rack or floor of the oven while preheating. Immediately after loading your bread onto its baking surface (stone, steel, or sheet), carefully pour about 1 cup of hot water or a handful of ice cubes into the preheated steam pan. Quickly close the oven door to trap the burst of steam. Be extremely careful of escaping steam when adding water and later when opening the oven door. Remove the steam pan after the initial oven spring period.
- Spray Bottle (Least Effective): Quickly spritzing the oven walls (avoiding the light and any glass) with water 2-3 times in the first few minutes of baking. Generates minimal steam that dissipates quickly. Better than nothing, but far less effective than the other methods.
- Venting Steam: Remember that steam is only beneficial during the initial rise. After about 15-25 minutes (depending on the recipe), you need to allow the steam to escape so the crust can dry out, set properly, and achieve its desired color and crispness.
Oven Care & Calibration
- Keep It Clean: Regularly clean spills and built-up grease from the oven interior and door. Heavy buildup can cause smoke, affect flavors, create uneven heating, and even pose a fire risk. Follow manufacturer instructions for cleaning (self-clean cycles, manual cleaning).
- Check the Door Seal: The gasket or seal around the oven door prevents heat from escaping. If it’s torn, brittle, or loose, your oven will lose heat, struggle to maintain temperature, and bake inefficiently. Replace worn seals.
- Consider Calibration: If, after using an independent thermometer, you find your oven is consistently off by a large margin or fluctuates wildly, it might benefit from professional calibration or servicing. Check your oven manual; some models allow for minor user calibration adjustments.
Conclusion: Befriend Your Baking Partner
Your oven is more than just an appliance; it’s the dynamic environment where heat transforms your careful preparations into finished delights. By understanding the basics of how it transfers heat, appreciating the critical importance of thorough preheating, and taking the time to learn its individual quirks – its true temperature, its hot spots – you can move from being at its mercy to being its knowledgeable partner.
Don’t underestimate the power of simple tools like an independent oven thermometer or techniques like rotating pans. For bread enthusiasts, exploring baking stones/steels and mastering safe steam creation can elevate your loaves to new heights. Treat your oven with care, keep it clean, and pay attention to how it behaves. By gaining these oven insights, you’ll be well on your way to achieving more consistent, predictable, and ultimately more beautiful and delicious baking results.