Embarking on your baking journey is thrilling! The promise of transforming simple ingredients like flour, sugar, eggs, and butter into delicious treats is captivating. However, those initial forays into the kitchen can sometimes yield results that are… well, less than perfect. Cakes might turn out dense, cookies spread into flat puddles, muffins emerge tough, or bread refuses to rise. While discouraging, these early setbacks are incredibly common, and often stem from a handful of easily avoidable mistakes rooted in misunderstanding fundamental baking principles.
The good news is that recognizing these common pitfalls is the first step towards overcoming them. Baking is often described as a science, and like any science, precision and understanding the “why” behind the steps are crucial. This guide highlights the top five blunders that frequently trip up aspiring bakers. We’ll explain why these mistakes derail recipes (often linking back to the basics of ingredients and techniques) and provide clear, actionable solutions to help you navigate around them, turning potential blunders into valuable learning experiences and setting you firmly on the path to baking success.
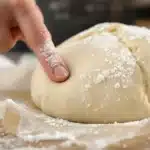
Blunder #1: Inaccurate Ingredient Measurement (Especially Flour!)
Perhaps the single most common error, yet the one with the most far-reaching consequences.
- The Mistake: Measuring key dry ingredients, particularly flour, using volume cups without the proper technique (or worse, just estimating). The classic error is dipping the measuring cup directly into the flour bag or canister and scooping. Measuring sugar and liquids inaccurately is also problematic, though flour is usually the biggest offender by volume.
- Why It’s a Blunder: Baking success hinges on the precise chemical reactions and physical interactions between ingredients. The ratio of flour to liquid, fat, sugar, and leaveners is critical for structure, texture, and rise.
- Flour Fiasco: Flour compacts easily. Scooping directly can pack an extra 20-30% (or more!) flour into the cup compared to what the recipe developer intended. This excess flour absorbs too much liquid, resulting in baked goods that are consistently dry, dense, tough, or crumbly. (Think back to our Flour Power discussion – the flour type matters, but so does the amount!).
- Sugar & Liquid Issues: While less prone to compaction errors, inaccurate amounts of sugar affect sweetness, browning, tenderness, and moisture. Incorrect liquid amounts throw off hydration, impacting everything from gluten development to leavening.
- The Fix: Precision is paramount!
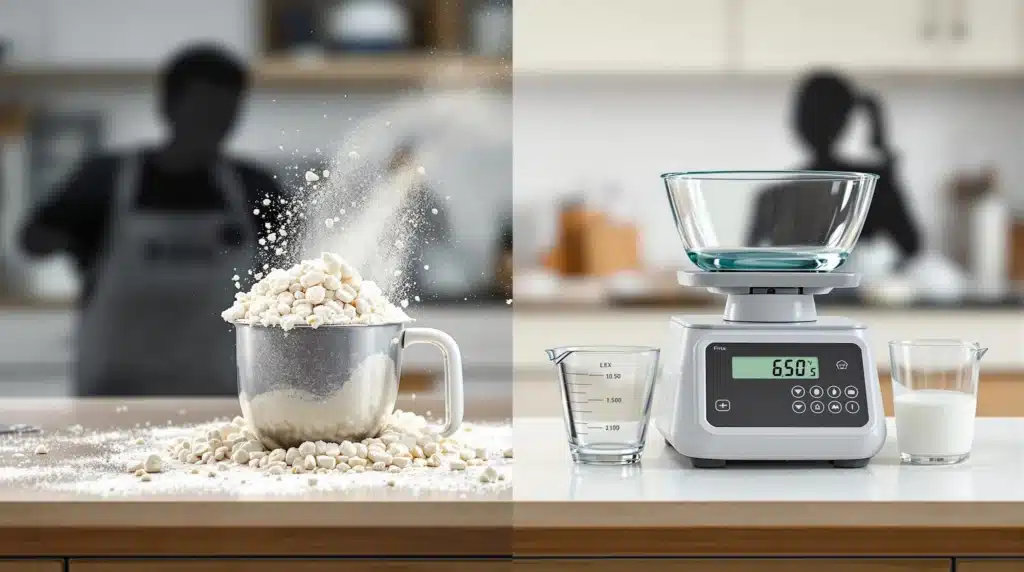
- ✅ Use a Digital Kitchen Scale: This is the gold standard and the best investment a baker can make. Weighing ingredients (especially flour, sugar, and often liquids) in grams provides unparalleled accuracy and consistency, eliminating guesswork and volume variations. Most reliable modern recipes provide weight measurements for this reason.
- ✅ If Using Measuring Cups (Flour): Master the “Spoon and Level” method. First, fluff up the flour in its container with a spoon or whisk. Then, use a spoon to lightly transfer flour into the dry measuring cup until it’s overflowing slightly. Finally, use the straight edge of a knife or an offset spatula to sweep across the top, leveling the flour off perfectly flat with the rim. Never scoop the cup directly into the flour.
- ✅ Measuring Liquids: Use a clear liquid measuring cup with a spout and measurement markings on the side. Place it on a level surface and bend down so your eyes are level with the desired marking to read it accurately.
- ✅ Measuring Brown Sugar: Because of its moisture, brown sugar needs to be packed firmly into a dry measuring cup until level, unless the recipe specifies “loosely packed.”
Blunder #2: Ignoring Ingredient Temperatures (Butter, Eggs, Liquids)
Recipes often specify whether ingredients like butter, eggs, milk, or water should be cold, room temperature, softened, melted, or even a specific temperature range (like for activating yeast). Ignoring these details is asking for trouble.
- The Mistake: Using ingredients straight from the refrigerator when “room temperature” or “softened” is called for, using melted butter instead of softened, or guessing the temperature of liquids for yeast activation.
- Why It’s a Blunder: Temperature profoundly impacts how ingredients behave and interact chemically and physically.
- Creaming Catastrophe: Using cold butter or cold eggs when creaming butter and sugar prevents proper aeration. The butter won’t blend smoothly, won’t trap air effectively, and cold eggs can cause the mixture to curdle or break. This leads to dense, heavy cakes and cookies. (Remember our Butter Basics and Egg-cellent Eggs insights!).
- Flaky Failures: Using softened or melted butter when cold butter is needed for pie crusts or biscuits destroys the potential for flakiness, as the fat blends too much instead of creating separate layers.
- Yeast Woes: Adding yeast to liquids that are too hot (typically above 120-140°F / 49-60°C, depending on yeast type) will kill it instantly, resulting in no rise. Liquids that are too cold will make the yeast sluggish and dramatically slow down or inhibit fermentation. (As discussed in Yeast Whisperer).
- The Fix: Pay close attention to temperature cues!
- ✅ Read Ahead: Check the recipe for temperature requirements before you start.
- ✅ Plan Accordingly: Allow adequate time (often 30-60 minutes) for butter and eggs to sit out on the counter and naturally reach room temperature (around 68-70°F / 20-21°C).
- ✅ Quick Softening/Warming: To speed things up slightly, you can cut cold butter into small cubes or place cold eggs in a bowl of warm (not hot) tap water for 5-10 minutes. Avoid microwaving butter unless melting is intended, as it heats unevenly.
- ✅ Use a Thermometer: An instant-read thermometer is essential for accurately checking the temperature of liquids (water, milk) before adding yeast. Don’t rely on guesswork!
Blunder #3: Over-Mixing Batters (Muffins, Quick Breads, Cakes)
Driven by a desire for a perfectly smooth batter, many beginners vigorously mix ingredients long after they are combined, especially when dealing with quick breads, muffins, pancakes, and some cake batters.
- The Mistake: Mixing batter until every single lump is gone and the mixture looks perfectly smooth and homogenous.
- Why It’s a Blunder: For these types of tender baked goods (which usually rely on chemical leaveners and minimal gluten), over-mixing develops too much gluten in the wheat flour. While gluten is essential for chewy bread, excess gluten in these items results in an undesirable tough, chewy, rubbery texture. It also often leads to the formation of “tunnels” – long, irregular air pockets – running through the finished product. (Think back to Mixing Methods and the importance of minimizing gluten for tenderness).
- The Fix: Embrace the lumps (within reason)!
- ✅ Understand the Goal: For the “muffin method” and similar quick-mix recipes, the aim is to combine wet and dry ingredients just until the dry ingredients are moistened.
- ✅ Mix Minimally: Use a spatula or wooden spoon and stir gently. Stop mixing as soon as you no longer see large patches of dry flour.
- ✅ Lumps are Okay: A slightly lumpy batter is often the sign of a perfectly under-mixed batter (in a good way!), indicating minimal gluten development and promising a tender result.
- ✅ Follow Instructions: When recipes say “mix until just combined” or “do not overmix,” take it seriously!
Blunder #4: Not Preheating the Oven Properly (Or Trusting the Dial)
This mistake sabotages your bake before it even properly begins.
- The Mistake: Placing your carefully prepared creation into an oven that hasn’t fully reached the temperature specified in the recipe, or blindly trusting that the temperature shown on the oven dial is accurate.
- Why It’s a Blunder: Consistent, accurate heat from the very start is crucial for almost all baking processes.
- Prevents Proper Rise: Insufficient initial heat inhibits oven spring in yeast breads and slows the reaction of chemical leaveners, leading to dense, flat results. (Recall Oven Insights and Proof Positive).
- Affects Structure & Texture: Heat is needed to quickly set the structure of cakes, cookies, and pastries. Starting cool can cause proteins and starches to set improperly, leading to potential collapse or gummy textures. Fats might melt too slowly or quickly, affecting spread and flakiness.
- Causes Poor Browning: Insufficient heat leads to pale, unappealing crusts and surfaces.
- Oven Inaccuracy: Most home oven thermostats are inaccurate, sometimes significantly so. Baking at a temperature 25-50°F higher or lower than intended guarantees inconsistent results and makes following recipe times unreliable.
- The Fix: Treat your oven with respect and diligence.
- ✅ Preheat Thoroughly: Turn your oven on well in advance. Wait for the preheat indicator signal, then allow at least another 15-20 minutes for the oven walls and racks to fully heat soak and the temperature to stabilize before putting anything inside. (Longer for baking stones/steels).
- ✅ Use an Independent Oven Thermometer: This inexpensive tool is essential. Hang it or place it on the center rack to learn your oven’s actual operating temperature at various settings. Adjust your dial accordingly to achieve the target temperature.
- ✅ Minimize Peeking: Opening the oven door frequently lets out a significant amount of heat, dropping the temperature and potentially causing cakes or soufflés to fall. Trust the process and peek only when necessary towards the end of baking.
Blunder #5: Making Uninformed Substitutions
Baking recipes are often carefully balanced formulas. Casually swapping ingredients without understanding their function is a recipe for disaster.
- The Mistake: Substituting ingredients based on what’s convenient or perceived similarities, without considering their different chemical or physical properties. Examples: using baking powder for baking soda (or vice-versa), bread flour for cake flour, salted butter for unsalted, oil for solid fat in creaming recipes, different types of sugar 1:1, applesauce for eggs in a standard cake recipe.
- Why It’s a Blunder: Each key ingredient performs multiple roles (as explored throughout this “Baking Basics” series!). Substitutions can disrupt this balance:
- Leaveners: Baking soda needs acid; baking powder is self-contained. Swapping them affects rise and can leave a soapy taste.
- Flour: Different protein levels dictate structure and texture (tenderness vs. chewiness).
- Fat: Type (butter, oil, shortening) and temperature (cold, soft, melted) dramatically impact flakiness, tenderness, spread, and flavor.
- Sugar: Affects not just sweetness but moisture, browning, tenderness, and spread. Liquid vs. crystalline sugars behave differently.
- Eggs: Provide structure, leavening, richness, binding, emulsification – hard to replace effectively.
- The Fix: Be substitution savvy!
- ✅ Follow the Recipe (Especially Initially): As a beginner, stick to the ingredients specified. This helps you learn how recipes are intended to work.
- ✅ Understand Ingredient Functions: The best way to make smart substitutions later is to first understand why each ingredient is in the recipe and what it does (hopefully, this series has helped!).
- ✅ Research Reliable Substitutions: If you need to substitute due to dietary restrictions or availability, consult reputable baking resources for tested equivalents. Understand that even good substitutions will likely alter the final flavor or texture somewhat.
- ✅ Don’t Swap Key Functional Ingredients Lightly: Be especially cautious when substituting leaveners, the main type of flour, the primary fat source, or eggs in recipes where they provide critical structure.
- ✅ Start Small: If experimenting, consider trying a substitution on a half-batch first to see the results before committing to a full recipe.
Conclusion: Turning Blunders into Building Blocks
Everyone makes mistakes when learning a new skill, and baking is no exception! Those early baking blunders, while sometimes frustrating, are invaluable learning opportunities. By understanding the science behind why these common errors occur – inaccurate measurements disrupting ratios, wrong temperatures hindering reactions, over-mixing creating toughness, improper heating preventing rise, and uninformed substitutions changing chemistry – you can actively avoid them.
Notice how often the solutions come back to core principles: precision (measuring ingredients accurately, controlling temperatures), understanding ingredient function (why use this flour or that fat state?), and following technique (mixing properly, preheating thoroughly). Master these basics, pay attention to detail, and don’t be afraid to consult reliable resources (and your oven thermometer!). By turning these potential blunders into foundational knowledge, you’ll build confidence and dramatically increase your chances of consistently achieving delicious, rewarding results in all your future baking adventures. Happy baking!