You’ve been bitten by the baking bug! You’re poring over recipes, dreaming of delicious creations, and eager to get started. But then reality hits as you browse online stores or walk the aisles of a kitchenware shop – stand mixers with hefty price tags, dozens of specialized pans, countless tempting gadgets… Suddenly, your exciting new hobby starts to look potentially expensive. Does embarking on a baking journey really require draining your savings account?
Absolutely not! While it’s easy to be dazzled by high-end equipment, the truth is that baking can be a wonderfully accessible and affordable hobby. The perception that you need a professional-grade setup right from the start can be a significant barrier, preventing many enthusiastic beginners from even taking the first step. The secret lies in smart planning, prioritizing essentials, and employing a bit of resourcefulness. This guide will provide practical strategies and tips to help you build a functional and effective baking toolkit without breaking the bank.
Prioritize the True Essentials (Focus on the Foundation)
The most important principle of budget baking is to start with the basics. Recall our earlier discussion distinguishing “Must-Haves” from “Nice-to-Haves” in Your First Baker’s Toolkit. Don’t feel pressured to buy everything at once. Focus only on acquiring the core items genuinely needed for the types of baking you plan to tackle initially.
Your Absolute Must-Have Shopping List (Budget Edition):
- Accurate Measuring Tools: This is non-negotiable for baking success.
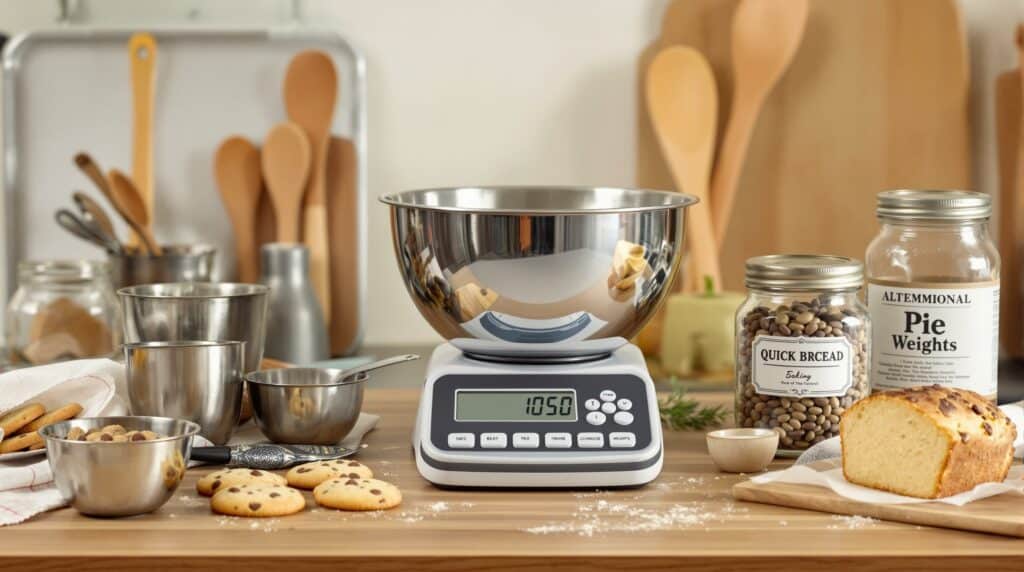
- Best Value Investment: A reliable digital kitchen scale. It offers the biggest improvement in accuracy and consistency for a relatively low cost (often $15-$30) and reduces cleanup by allowing direct measuring into bowls (using the tare function).
- If Starting with Volume: Get sturdy, standard-sized dry measuring cups and measuring spoons. Learn the “spoon and level” method for flour immediately. A clear liquid measuring cup is also essential.
- Basic Mixing Tools:
- A set of sturdy mixing bowls (stainless steel is often durable and affordable).
- At least one robust wire whisk.
- A couple of heat-resistant silicone spatulas.
- A strong wooden spoon.
- Versatile Core Bakeware: Choose pieces that serve multiple purposes.
- A heavy-duty, light-colored rimmed baking sheet (half-sheet size is ideal).
- A standard loaf pan (metal or glass).
- One basic round cake pan (8 or 9-inch) OR one square baking pan (8×8 or 9×9 inch), depending on whether cakes or brownies/bars are your initial focus. You don’t need both immediately.
- A standard 12-cup muffin pan if muffins/cupcakes are an early goal.
- Other Key Essentials:
- An inexpensive independent oven thermometer.
- Reliable oven mitts or pot holders.
- A roll of parchment paper (often more cost-effective initially than silicone mats).
- A wire cooling rack.
With just this foundational set, you can successfully bake a huge variety of cookies, simple cakes, muffins, quick breads, brownies, basic yeast breads, and more. Delay purchasing the stand mixer, the fancy specialty pans, and the army of gadgets until you’ve mastered the basics and know where your baking interests truly lie.
Smart Shopping Strategies: Hunt for Value
- Compare Prices: Don’t just grab the first pan you see. Check prices across different retailers – online giants (Amazon, etc.), department stores (during sales), big-box stores (Target, Walmart), and local kitchen supply shops. Prices for similar items can vary widely.
- Seek Sales and Discounts: Be patient! Wait for major holiday sales (Black Friday, post-holiday clearances) or end-of-season deals. Sign up for email newsletters from kitchenware retailers to receive coupons and sale notifications.
- Explore Restaurant Supply Stores: These are often hidden gems for budget-conscious bakers. They sell durable, no-frills, professional-quality basics like heavy-gauge aluminum baking sheets, stainless steel mixing bowls, whisks, spatulas, and storage containers, often at prices significantly lower than consumer-focused brands. The focus is on function and durability over fancy aesthetics.
- Check Discount Retailers: Stores like TJ Maxx, Marshalls, HomeGoods, Ross (in the US), or similar off-price chains often carry brand-name bakeware, tools, and gadgets at considerably reduced prices. The selection is constantly changing, so check back often, but you can find excellent deals on quality items.
Embrace Secondhand & Pre-Owned Gear: Treasure Hunting
Don’t overlook the potential of used items! Many perfectly good baking tools can be found secondhand at a fraction of their original cost.
- Thrift Stores (Goodwill, Salvation Army, local charity shops) & Garage/Yard Sales: These can be goldmines. Keep an eye out for:
- Sturdy glass or ceramic bakeware (Pyrex, CorningWare, stoneware pie dishes – inspect carefully for chips and cracks).
- Metal bakeware (avoid heavily scratched nonstick or badly rusted items, but basic aluminum or stainless pans are often great finds).
- Mixing bowls (stainless steel or glass).
- Measuring cups and spoons (check for standard sizes and clear markings).
- Whisks, spatulas, wooden spoons, rolling pins (ensure they are in good condition).
- Always wash secondhand items thoroughly before first use.
- Online Marketplaces: Sites like Facebook Marketplace, Craigslist, OfferUp, or eBay can be good sources for used gear, potentially including bigger-ticket items like stand mixers being sold by people upgrading or moving. Exercise caution: check photos and descriptions carefully, ask questions about condition, and prioritize safe, local pickups when possible.
- Ask Friends & Family: Spread the word that you’re starting to bake! People often have duplicate kitchen items, unused wedding gifts, or equipment they no longer need after upgrading. You might receive items for free or be able to buy them very cheaply.
Choose Versatility & Multi-Taskers: Maximize Utility
When buying new or used, prioritize items that can pull double or triple duty in your kitchen.
- Multi-Purpose Pans: A sturdy rimmed baking sheet isn’t just for cookies; use it for roasting vegetables, baking slab pies or sheet cakes, toasting nuts, or catching drips under a bubbling pie. A 9×13 inch pan is great for cakes, brownies, bars, coffee cakes, and savory casseroles. A standard loaf pan works for yeast breads, quick breads, pound cakes, and even meatloaf.
- Multi-Tasking Tools: A simple fine-mesh sieve works perfectly well as a flour sifter, a strainer for custards, or for dusting powdered sugar. A bench scraper divides dough, cleans surfaces, scoops chopped ingredients, and can even smooth frosting in a pinch. A heatproof silicone spatula is great for mixing, folding, and cooking scrambled eggs or sauces on the stove.
- Avoid “Unitaskers” (Especially Early On): Resist the temptation to buy gadgets that perform only one very specific task you might do infrequently (like an avocado slicer, a specialized cake pop maker, or an “all-edge” brownie pan). Master the basics with versatile tools first.
DIY & Resourcefulness: Save Pennies
Think creatively before buying specialized items:
- Parchment vs. Silicone: While silicone mats are reusable, a large roll of parchment paper bought from a warehouse club or restaurant supply store is often more economical initially and extremely effective for preventing sticking and aiding cleanup.
- Makeshift Proofing: No need for a fancy proofing box. Use your oven with just the light on, or place dough in a turned-off microwave with a cup of recently boiled water to create warmth and humidity.
- DIY Pie Weights: Instead of buying ceramic or metal pie weights for blind baking crusts, use dried beans or uncooked rice placed on a piece of parchment paper inside the crust (keep these beans/rice separate and reuse them only for this purpose).
- Simple Decorating: Before investing in elaborate piping tip sets, practice frosting smoothly with an offset spatula (a good investment!) or even a regular knife. A dusting of powdered sugar or cocoa powder via a sieve adds an elegant finish.
- Greasing & Flouring: While convenient, nonstick spray isn’t essential. Learn the traditional (and very effective) method of greasing pans with butter or shortening and dusting lightly with flour. Paper cupcake/muffin liners are also inexpensive and make cleanup easy.
Focus on Foundational Skills, Not Fancy Gear
Remember, the most important ingredient in successful baking is skill, not expensive equipment. A baker who understands how ingredients work, masters fundamental techniques (like proper measuring, mixing methods, temperature control, kneading), and knows how to use basic tools effectively can produce far better results than someone with a top-of-the-line mixer who doesn’t grasp the basics. Don’t let a lack of fancy gear intimidate you or prevent you from practicing and learning. You can make truly wonderful things with a simple setup.
Build Your Kit Gradually
Think of assembling your baking toolkit as a slow and steady process, not a one-time shopping spree.
- Start with the absolute essentials you need for the first few recipes you want to try.
- As you bake more, you’ll naturally identify gaps or tools that would genuinely make your life easier or improve your results (“I really wish I had a scale,” “A bench scraper would make handling this dough so much better,” “I bake cookies often enough that scoops would save time”).
- Add these items incrementally, as your budget allows and your skills and interests guide you. This approach prevents impulse buys of things you won’t use and ensures your toolkit grows organically alongside your baking journey.
Conclusion: Bake Smart, Spend Smart
The idea that you need an expensively equipped kitchen to enjoy baking is a myth. By prioritizing the essential tools that ensure accuracy and enable basic techniques, shopping smartly, exploring secondhand options, valuing versatility, and focusing on building your skills, you can absolutely create delicious and impressive baked goods without breaking the bank.
Start with a solid foundation of must-have gear, resist the allure of unnecessary gadgets, and let your toolkit evolve naturally as you learn and grow as a baker. Resourcefulness, patience, and a focus on mastering the fundamentals are your most valuable assets. Happy (budget-friendly) baking!
