Close your eyes and picture it: the delicate, shattering sound as you bite into a perfectly baked croissant, revealing feather-light, airy layers within. Or imagine the impressive height and crispness of classic puff pastry, forming the foundation for elegant vol-au-vents or sweet mille-feuille. This incredible texture, this seemingly magical separation into countless thin, buttery layers, isn’t magic at all – it’s the result of a meticulous and fascinating pastry technique known as lamination.
For many aspiring pastry bakers, lamination represents a Mount Everest of technique. It involves precise folds, careful temperature control, lots of high-quality butter, and a significant investment of time (mostly chilling time, thankfully!). The process can seem complex and intimidating, perhaps discouraging beginners from attempting these iconic pastries. But understanding the principles behind lamination – the “love affair” between dough and butter – demystifies the process. Let’s break down the secrets of lamination and provide the foundational knowledge you need to tackle classics like croissants and puff pastry with confidence.
What is Lamination? The Science of Layers
At its core, lamination is the culinary technique of creating numerous ultra-thin alternating layers of dough and fat (almost always butter in classic pastry) through a specific process of repeated rolling and folding.
How Does it Create Flakiness and Puff? The magic happens in the oven, driven by basic physics:
- Steam Power: Butter contains water (standard butter is ~15-18% water). During baking, the intense heat rapidly turns the water trapped within each thin butter layer into powerful steam.
- Layer Separation: This steam pushes forcefully upwards, lifting and separating the thin dough layer above it before the dough’s structure fully sets.
- Fat Barrier & Frying Effect: As the butter melts, the fat coats the dough layers, preventing them from sticking back together. It also essentially ‘fries’ the dough layers slightly from within, contributing to their crispness and richness.
The result of this repeated layering and steam-driven separation is the creation of potentially hundreds (for croissants and Danish) or even thousands (for classic puff pastry) of incredibly thin, distinct, crisp layers – the hallmark of laminated pastries.
The Key Components: Two main parts form the basis of laminated dough:
- The Détrempe: This is the base dough itself. Its composition varies depending on the final product.
- For puff pastry, it’s typically a very simple, lean dough made from just flour, water, salt, and perhaps a little acid (like vinegar or lemon juice, which helps relax the gluten) or a small amount of butter mixed in.
- For croissants and Danish pastry (Viennoiserie), the détrempe is an enriched dough, containing yeast (for leavening and flavor), often milk instead of water, and sometimes sugar and eggs. This détrempe needs some gluten development (through mixing/kneading) and usually undergoes a bulk fermentation (first rise) before the lamination process begins.
- The Beurrage: This is the block of fat that gets enclosed within the détrempe. For the best results, this is almost always high-quality butter, specifically European-style butter with a higher butterfat content (typically 82% or more). Higher butterfat means less water, which contributes to crisper layers and less sogginess. Crucially, the butter also needs good plasticity – the ability to be pliable and spread evenly when cool without breaking or becoming oily.
The Lamination Dance: Key Steps & Techniques
While recipes vary in specifics (number of folds, resting times), the core process of lamination generally follows these key stages:
1. Preparing the Components (Temperature is Key!):
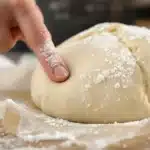
- Make the Détrempe: Mix the dough ingredients. Knead it briefly – just enough to develop some structure but not make it overly tough (especially important for puff pastry). Shape it into a square or rectangle, wrap it tightly in plastic wrap, and chill it thoroughly in the refrigerator (often for at least 30-60 minutes, sometimes longer). Chilling relaxes the gluten, makes the dough firmer, and helps match its temperature to the butter block later.
- Prepare the Beurrage: The butter needs to be pliable but still cold. It shouldn’t be rock hard from the fridge, nor soft and greasy. A common technique is to place cold butter between two sheets of parchment paper and pound it gently with a rolling pin to flatten and soften it slightly, eventually shaping it into a uniform square or rectangle of the specified size. Then, chill this butter block until it’s firm again but still pliable (similar consistency to the chilled détrempe is the goal). Matching the consistency of the chilled dough and the chilled butter block is critical for successful lamination; if one is much harder than the other, tearing or uneven layers will result.
2. Locking In the Butter (Encasement / Enfermage):
- Roll out the chilled détrempe on a lightly floured surface into a larger shape (often a square, rectangle, or cross shape, depending on the recipe).
- Place the prepared, chilled beurrage (butter block) onto the center of the détrempe (sometimes placed at a 45-degree angle on a square détrempe).
- Carefully fold the flaps of the détrempe over the butter block, completely enclosing it like wrapping a present or sealing an envelope. Ensure there are no gaps where butter can escape. Gently press the seams to seal. You now have one layer of butter encased in two layers of dough.
3. The Turns (Creating the Layers / Tourage): This is the heart of lamination, where rolling and folding multiply the layers.
- Rolling: Carefully roll the combined dough-and-butter packet out on a lightly floured surface into a long, even rectangle, typically about three times as long as it is wide. Focus on maintaining straight edges and, most importantly, a uniform thickness throughout. Use minimal flour for dusting – excess flour brushed off before folding is crucial, as trapped flour creates tough, dry layers instead of flaky ones.
- Folding: Perform a specific fold as directed by the recipe. The two most common types are:
- Single Turn (Letter Fold / Tour Simple): Imagine the rectangle divided into thirds. Fold one outer third over the center third, like folding a business letter. Then, fold the remaining outer third over the top. This creates 3 layers of butter and 4 layers of dough within that fold (though the total layer count multiplies differently due to how previous layers are handled).
- Double Turn (Book Fold / Tour Double): Mentally divide the rectangle into fourths. Fold both outer fourths towards the center line, leaving a small gap between them in the middle. Then, fold the entire thing in half along that center line, like closing a book. This creates 4 layers of butter and 5 layers of dough within the fold.
- Resting & Chilling (Absolutely VITAL): After completing each “turn” (or sometimes after a pair of turns), the dough must be wrapped tightly in plastic wrap and returned to the refrigerator to chill and rest thoroughly, often for 30 minutes to an hour or even longer. DO NOT SKIP OR RUSH THIS STEP! It serves two critical purposes:
- It allows the gluten in the dough to relax. If you try to roll immediately after folding, the dough will be too elastic, resist rolling, and likely tear.
- It re-chills the butter, keeping it solid and distinct from the dough layers. If the butter gets too soft or melts during rolling, the layers will merge, and you will lose all potential for flakiness.
4. Repetition:
- Repeat the process of rolling out the chilled dough, performing the specified fold (single or double), and chilling/resting for the number of turns required by the recipe. Puff pastry traditionally receives 6 single turns (or equivalent combinations like 4 double turns), while croissants and Danish often receive 3 single turns.
Lamination in Action: Croissants vs. Puff Pastry
These two iconic pastries showcase how variations in the détrempe and the lamination process lead to different results:
Croissants (& Viennoiserie)
- Détrempe: Starts with an enriched, yeasted dough. This means the base dough contains yeast for leavening and flavor, often milk for richness, and sometimes sugar or eggs. This dough typically undergoes a bulk fermentation (first rise) before the butter block is locked in and lamination begins.
- Lamination: Usually involves fewer turns (e.g., 3 single turns). This creates fewer total layers compared to puff pastry, but the layers are slightly thicker and more distinct.
- Result: The yeast provides an additional lift during the final proof. The final product has a beautiful flaky, crisp exterior but a softer, more tender, slightly bread-like (but still layered) interior crumb between the flaky crusts. Examples include classic croissants, pain au chocolat, almond croissants, and Danish pastries.
- Final Steps: After lamination and chilling, the dough is rolled out, cut (e.g., into triangles for croissants), shaped, allowed a final proof (to let the yeast work again), egg washed, and baked.
Classic Puff Pastry (Pâte Feuilletée)
- Détrempe: A very simple, lean dough typically containing only flour, water, salt, and maybe a touch of acid (like vinegar) or a small amount of incorporated butter. Crucially, it contains no yeast.
- Lamination: Traditionally involves more turns (e.g., 6 single turns or 4 double turns), resulting in potentially thousands of incredibly thin layers of dough and butter.
- Result: Relies entirely on the steam generated from the numerous butter layers for its dramatic “puff” or lift in the oven. The final texture is exceptionally light, airy, crisp, and brittle throughout, with no bread-like crumb. Examples include vol-au-vents, mille-feuille layers, turnovers (chaussons), and tart shells.
- Final Steps: After lamination and chilling, the dough is rolled out, cut into desired shapes, often “docked” (pricked with a fork) in areas where excessive puffing isn’t desired, sometimes chilled again briefly, potentially egg washed, and baked directly without any final proofing time.
Critical Factors for Lamination Success
Mastering lamination requires attention to detail. These factors are non-negotiable:
- TEMPERATURE CONTROL IS EVERYTHING: This cannot be overstated.
- Butter Plasticity: The beurrage must be cool but pliable – like cool modeling clay. If it’s too hard, it will shatter when rolled and tear the dough. If it’s too warm/soft, it will squeeze out the sides or simply blend into the dough layers, destroying the lamination. Aim for the butter block and the chilled détrempe to be roughly the same consistency when you lock the butter in and begin rolling.
- Mandatory Chilling: The rest periods in the refrigerator between turns are essential. They relax the gluten (preventing tearing) and resolidify the butter (keeping layers distinct). Don’t shortcut this!
- High-Quality Butter: Use European-style butter with a high butterfat content (82% or higher). Less water means crisper layers and better plasticity at cool temperatures. The flavor difference is also significant. Do not substitute margarine or low-fat spreads.
- Precise and Gentle Rolling: Roll the dough evenly to maintain uniform thickness – this ensures even layering and puffing. Try to roll primarily in one direction (lengthwise) before folding. Use gentle, even pressure; avoid pressing down so hard that you squeeze the butter out. Use the absolute minimum amount of flour necessary on your work surface to prevent sticking, and meticulously brush off any excess flour from the dough surface before folding it – trapped flour makes layers tough and pasty.
- Accurate Folding: Ensure the edges of the dough align neatly when performing single or double turns to create even layers across the entire block.
- Patience: Lamination is a process defined by waiting (for chilling). Accept that it takes time, mostly inactive time. Rushing leads to failure.
Troubleshooting Common Lamination Issues
- Butter Squeezing Out During Rolling: Butter was too soft/warm relative to the dough, or you applied too much pressure. Chill everything more thoroughly; use gentler pressure.
- Dough Tearing During Rolling: Gluten likely too tight (needs longer rest/chill), or the butter block was too cold and hard compared to the dough, causing it to punch through. Ensure adequate resting; let butter warm very slightly if rock hard (but still cold!).
- Uneven Puffing: Likely caused by uneven rolling thickness, inaccurate folding, or uneven butter distribution initially. Focus on precision.
- Not Puffing Enough: Layers likely compromised – butter got too warm and melted into the dough. Could also be insufficient turns or oven temperature too low initially. Revisit temperature control.
- Greasy Pastry After Baking: Often means the butter melted out before the structure set, possibly due to the oven temperature being too low initially or the layers being damaged during lamination.
Conclusion: The Rewarding Art of Layers
Lamination, the intricate dance between dough and butter, is undeniably one of pastry’s more demanding techniques. It requires precision, patience, and above all, meticulous temperature control. Yet, understanding the process – how creating those distinct layers allows steam to work its magic – removes much of the mystery. Whether you’re aiming for the tender-flaky balance of a croissant or the ethereal crispness of puff pastry, the fundamental principles remain the same: keep the butter plastic but cold, allow the gluten to relax through chilling, roll gently and evenly, and fold accurately.
Don’t be intimidated! Start with a clear recipe, give yourself ample time, focus on temperature, and be patient with the process and with yourself. Your first attempt might not be perfect, but the skills and understanding you gain are invaluable. Mastering the lamination “love affair” is incredibly rewarding, opening the door to creating truly impressive, bakery-quality pastries in your own kitchen.