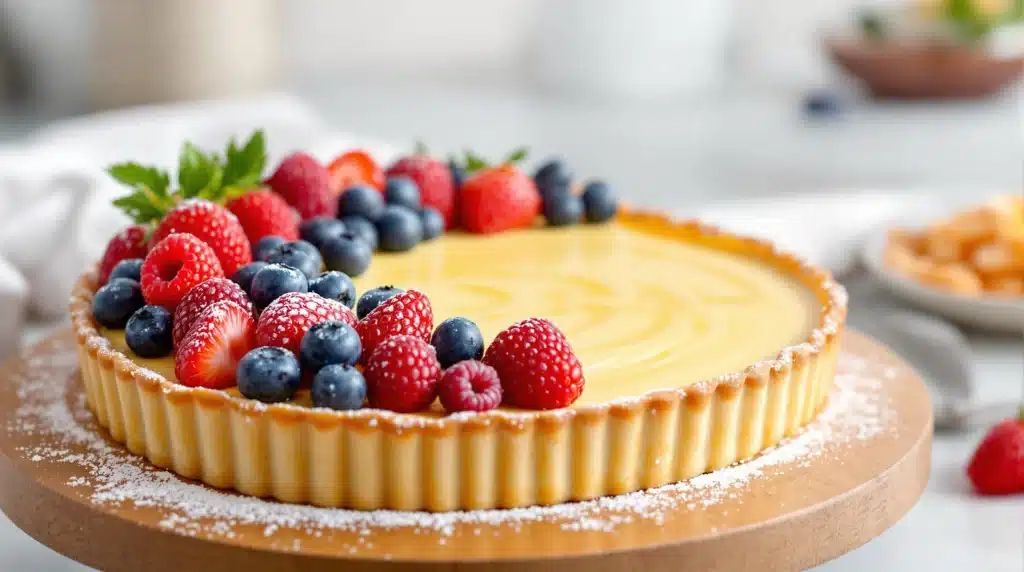
There’s an undeniable elegance to a well-made tart. Whether it’s a classic fruit tart brimming with glossy berries over vanilla cream, a tangy lemon meringue tart, a rich chocolate ganache creation, or a savory quiche, the foundation is always that essential shell. The perfect tart strikes a delicate balance: a buttery, crisp, or tenderly crumbly crust that provides structural integrity and textural contrast, holding within it a luscious, flavorful filling that complements rather than compromises the shell.
Achieving this balance, however, can be tricky for the home baker. Common frustrations include tart shells that shrink dramatically during baking, turn out tough instead of tender, or worst of all, suffer the dreaded “soggy bottom” when filled. Likewise, fillings might weep, fail to set, or overwhelm the delicate crust. Mastering the art of the tart isn’t about magic; it’s about employing specific Tart Tactics – understanding the right doughs, proper handling techniques, the crucial role of blind baking, and smart filling strategies. Let’s explore the key tactics needed to create tarts with perfectly crisp shells and stable, delicious fillings every time.
The Foundation: Understanding Tart Dough
First, it’s important to recognize that classic tart doughs often differ from the flaky, layered American-style pie crust. While both rely on fat and flour, tart doughs generally aim for a different texture – typically richer, crisper like a cookie, or shorter and sandier – providing a firm yet delicate base.
Common Tart Dough Types (Pâtes):
- Pâte Sucrée (Sweet Pastry Dough): As the name suggests, this dough is sweeter and often richer than others. It can be made using the creaming method (beating softened butter and sugar before adding flour and egg) or the sablage method (rubbing cold butter into flour and sugar first). The result is a crisp, sturdy, almost cookie-like crust that holds up well to moist fillings. It’s an excellent choice for tarts filled with pastry cream, lemon curd, ganache, or almond frangipane.
- Pâte Sablée (Sandy Pastry Dough): Sablée means “sandy” in French, perfectly describing this dough’s texture. It’s typically made by rubbing or cutting cold butter into the flour and sugar mixture before adding the egg/liquid, creating very small, flour-coated fat particles. This inhibits gluten development significantly, resulting in an extremely tender, delicate, crumbly crust with a melt-in-your-mouth quality. It’s often less sweet than pâte sucrée and can be more fragile to handle. Ideal for fruit tarts where the crust’s tenderness is highlighted.
- Pâte Brisée (Basic Shortcrust): This is closer in character to American pie dough, though often slightly less flaky and more sturdy. It contains little to no sugar and is made by cutting cold fat (butter or sometimes shortening/lard) into flour, then adding just enough ice water to bind. Its texture can range from moderately flaky to short and crisp depending on how finely the fat is incorporated. Brisée means “broken,” referring to the pieces of fat. It’s versatile for both sweet and savory tarts and quiches.
Key Ingredients & Handling Principles:
- Flour: All-purpose or pastry flour is commonly used.
- Fat: High-quality unsalted butter is preferred for flavor and texture. Temperature is crucial: cold and cut/rubbed in for sablée and brisée; sometimes softened for creamed sucrée.
- Sugar: Primarily confectioners’ sugar (for smooth texture) in sucrée and sablée. Little or none in brisée.
- Egg/Yolk: Adds richness, tenderness, color, and helps bind the dough.
- Liquid: Usually ice water or sometimes milk, added very sparingly – just enough to bring the dough together.
- Minimal Handling: Overworking develops gluten, making the crust tough. Mix ingredients only until just combined. Keep ingredients (especially fat and water for sablée/brisée) cold to maintain texture.
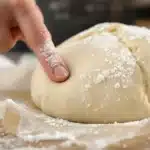
- Chilling is Mandatory: Tart dough must be thoroughly chilled after mixing (to rest gluten and firm fat) and again after lining the pan (to prevent shrinkage).
Lining the Tin: Precision & Prevention
How you handle the dough when lining the tart pan significantly impacts the final shell’s shape and integrity.
- Choosing the Pan: Classic tart pans feature straight, often fluted, sides and a removable bottom. This design is highly recommended as it makes removing the finished tart cleanly and easily without damaging the delicate crust. Metal pans (especially dark metal or perforated ones) generally conduct heat better and promote better browning and crisping of the crust compared to glass or ceramic.
- Rolling Out Evenly: On a lightly floured surface, roll the thoroughly chilled dough from the center outwards, rotating frequently, into an even circle or rectangle (depending on your pan shape) that is slightly larger than your tart pan. Aim for the thickness specified in the recipe, usually 1/8 to 1/4 inch (3-6mm). Uneven thickness leads to uneven baking.
- Transferring to the Pan: Gently transfer the rolled dough into the tart pan without stretching it. Stretching dough leads to shrinkage during baking. Common methods include: lightly folding the dough into quarters, then unfolding in the pan; carefully rolling the dough up onto your rolling pin and unrolling it over the pan; or rolling between two sheets of parchment, removing the top sheet, and inverting the dough into the pan.
- Fitting the Dough: Ease the dough into the pan, gently pressing it firmly into the bottom edge and up the sides, especially into the corners or flutes. Avoid trapping air pockets between the dough and the pan. Use a small scrap of excess dough dipped in flour to help press it in without warming it with your fingers.
- Trimming the Edge: Create a neat edge by trimming the excess dough. You can run a rolling pin over the sharp top edge of the tart pan, use a small sharp paring knife held parallel to the countertop to cut along the rim, or simply press firmly against the edge. Some bakers prefer to leave a slight overhang and trim it neatly after blind baking.
- Docking (Optional Poking): Use the tines of a fork to prick small holes all over the bottom of the dough before chilling and blind baking. This allows steam to escape from underneath during baking, preventing the base from puffing up excessively. However, if using pie weights effectively during blind baking, docking may not always be necessary (and isn’t desirable if the filling is very liquid).
- CHILL AGAIN (Crucial Step!): Once the tart pan is lined, chill the shell thoroughly in the refrigerator for at least 30 minutes, or in the freezer for 15-20 minutes, until very firm. Do not skip this step! Chilling solidifies the fat again and allows the gluten strands (which were stretched during rolling) to relax. This dramatically minimizes shrinkage of the crust sides during baking.
Blind Baking: The Secret to Crispness
Blind baking simply means pre-baking the tart shell, either partially or fully, before adding the filling. It is the single most important technique for preventing a soggy bottom crust.
- When is it Necessary?
- Always when the filling itself is not baked (e.g., pastry cream and fresh fruit, chocolate ganache, lemon curd added after cooling).
- Often when the filling is very wet or custardy (e.g., quiche, pumpkin pie), even if the filling will be baked further. Pre-baking sets the crust structure first.
- Partial vs. Full Blind Baking:
- Partial: The shell is baked until set and lightly colored but not fully browned. Used when the tart will be filled and then returned to the oven for further baking (e.g., quiche).
- Full: The shell is baked until completely cooked through, dry, and golden brown. Used for tarts with unbaked fillings.
- The Blind Baking Process:
- Prepare the Chilled Shell: Remove your thoroughly chilled, lined tart shell from the fridge/freezer.
- Line with Parchment: Cut a large piece of parchment paper (crumpling it into a ball first makes it more pliable and easier to fit into corners). Press the parchment firmly inside the chilled shell, ensuring it lines the bottom and sides completely.
- Add Weights: Fill the parchment-lined shell completely to the brim with pie weights (ceramic or metal beads designed for this purpose) or use dried beans or uncooked rice (keep these separate and reuse them only for blind baking, as they won’t be suitable for eating afterwards). Filling fully ensures the weights support the sides and prevent slumping, as well as keeping the bottom flat.
- First Bake (With Weights): Place the weighted shell in a preheated oven (temperature as per recipe, often moderate like 375°F/190°C). Bake for about 15-20 minutes (for standard 9-inch tart), or until the edges of the crust look set and are just beginning to turn lightly golden.
- Remove Weights & Parchment: Carefully lift the parchment paper (along with the hot weights/beans) out of the tart shell. Be cautious as the weights will be very hot.
- Second Bake (Naked): Return the now-empty tart shell to the oven. Continue baking for another 10-20 minutes (or as recipe directs). For a partial blind bake, bake until the bottom looks dry and perhaps lightly colored. For a full blind bake, bake until the entire shell is a uniform, deep golden brown and looks fully cooked and crisp.
- (Optional) Seal the Crust: For extra protection against sogginess, especially with very wet fillings, you can seal the hot baked crust. Lightly whisk an egg white (or whole egg) and quickly brush a very thin layer over the inside bottom (and maybe sides) of the hot shell immediately after removing the weights or when fully baked. Return it to the hot oven for just 1-2 minutes to set the wash. This creates a moisture-resistant barrier. Let cool completely before filling if using an unbaked filling.
Preventing Soggy Bottoms: More Tactical Tips
Beyond blind baking, other tactics can help ensure a crisp base:
- Use the Egg Wash Seal: As described above, this creates a helpful barrier.
- Create a Moisture Barrier: Sprinkle a thin layer of fine, dry breadcrumbs, crushed plain cookies (like vanilla wafers or amaretti), ground nuts (like almond meal), or even finely grated hard cheese (for savory tarts) over the bottom of the baked shell before adding a wet filling. This layer absorbs excess moisture. A thin layer of melted and set chocolate also works well for sweet tarts.
- Bake on a Preheated Surface: Place your tart pan directly onto a preheated baking stone or heavy baking sheet. This provides intense bottom heat, helping the crust cook through and crisp up quickly before the filling makes it wet.
- Ensure Filling is Thick Enough: Make sure custard or cream fillings are cooked properly to achieve the correct thickness so they don’t seep excessively into the crust. Chill fillings adequately where appropriate.
- Fill Just Before Serving: If possible, especially with fully baked shells and unbaked fillings (like pastry cream and fresh fruit), assemble the tart closer to the time of serving for maximum crust crispness.
Luscious Fillings: Considerations & Pairings
The filling is the heart of the tart, but consider these points:
- Stability and Setting: Use recipes with appropriate thickeners (eggs, starch, gelatin) and follow cooking/chilling instructions carefully to ensure your filling sets properly and doesn’t weep or turn runny.
- Temperature Harmony: Add cool fillings to completely cooled shells (for fully baked shells). Add fillings that require further baking (like quiche custard or frangipane) to partially baked shells, then return to the oven.
- Classic Pairings:
- Pâte Sucrée (Sweet/Crisp): Lemon curd, pastry cream & fruit, chocolate ganache, almond frangipane.
- Pâte Sablée (Tender/Sandy): Fresh fruit & glaze, sometimes custards or frangipane where tenderness is key.
- Pâte Brisée (Flaky/Savory/Less Sweet): Quiche fillings, savory vegetable tarts, classic apple or other fruit tarts.
- Balance: Think about the interplay between the crust’s texture and richness and the filling’s flavor, texture, and sweetness. Aim for harmonious contrast.
Conclusion: Your Tart Toolkit
Creating truly exceptional tarts consistently comes down to mastering a set of core tactics. It starts with choosing the right type of dough (sucrée, sablée, or brisée) for your desired outcome and handling it minimally to maintain tenderness. Careful lining of the pan followed by thorough chilling is non-negotiable to prevent shrinkage. Employing the blind baking technique, often with weights and potentially an egg wash seal, is your greatest weapon against the dreaded soggy bottom. Finally, ensure your luscious fillings are properly prepared and added at the right temperature to a shell baked to the appropriate stage.
Armed with these tart tactics, you can move beyond common pitfalls and confidently create beautiful, delicious tarts where a perfectly crisp, buttery shell provides the ideal foundation for an equally impressive filling.