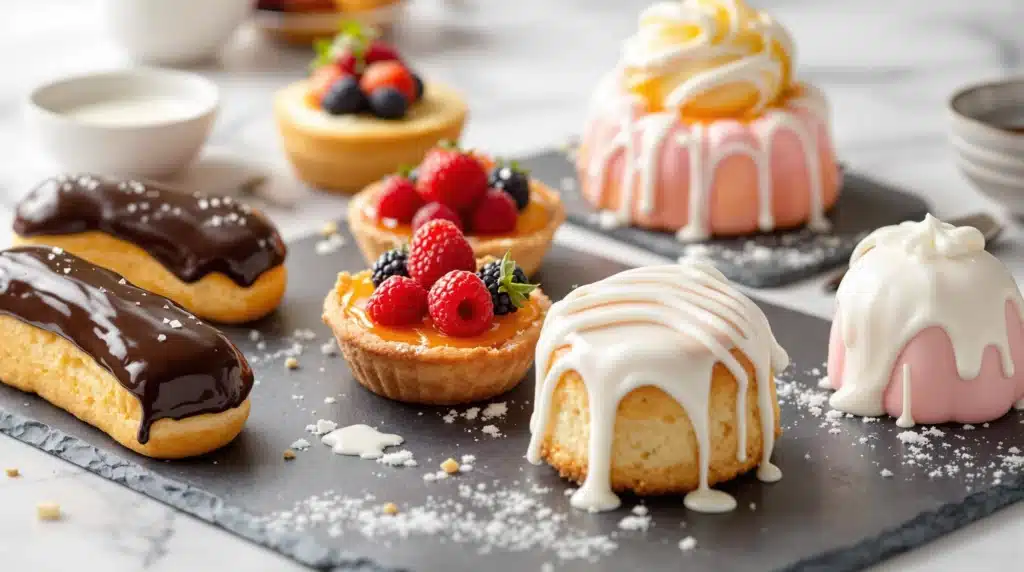
Think about the visual appeal of pastries lining a bakery case. What often catches the eye first? It might be the mirror-like shine on a chocolate éclair, the glossy coating on fresh fruit atop a tart, the delicate drizzle over a scone, or the smooth, opaque shell of a petit four. That final, often lustrous, touch is the glaze – a seemingly simple addition that can elevate a baked good from homemade to truly professional-looking, while also contributing flavor, texture, and even freshness.
For aspiring pastry bakers, understanding the different types of glazes and how to use them effectively is a key skill in the finishing stages of dessert creation. It’s more than just pouring something sweet over the top; the right glaze, applied correctly, provides polish and enhances the overall eating experience. Let’s dive into the “Glaze Craze,” exploring the purpose behind glazing, common types used in pastry arts, and the techniques needed to achieve that perfect shine, flavor, and finish.
Why Glaze? The Purpose of the Final Touch
Glazes might seem like just a pretty topping, but they serve several important functions in pastry work:
- Appearance & Shine: This is often the most obvious benefit. Glazes add a beautiful gloss or sheen, making pastries look more finished, professional, and appetizing. A smooth glaze can also cover minor imperfections on the surface of a cake or pastry.
- Flavor Addition: Glazes contribute sweetness and can introduce specific flavors – vanilla, lemon, orange, chocolate, coffee, fruit – that complement the underlying pastry or cake.
- Moisture Seal: Certain glazes, particularly fruit glazes on tarts or thin sugar glazes on cakes, can create a barrier that helps seal the surface, slowing down moisture loss and keeping the item fresher for longer.
- Texture Contrast: Glazes add another textural element. A thin powdered sugar glaze might dry to a delicate crackle, a chocolate ganache glaze sets to a soft fudgy layer, and poured fondant creates a distinctively firm shell.
- Adhesive Surface: A slightly sticky glaze can act like glue, helping toppings such as chopped nuts, sprinkles, coconut flakes, or even decorative elements adhere securely.
The Glaze Spectrum: Common Types & Techniques
The term “glaze” covers a wide range of toppings with different ingredients, consistencies, and applications. Let’s explore some of the most common ones used in pastry:
Simple Powdered Sugar Glazes (Basic Icing)
This is the easiest and often quickest type of glaze to make.
- Key Ingredients: Confectioners’ (powdered/icing) sugar sifted to remove lumps, a small amount of liquid (milk, cream, water, lemon juice, orange juice), usually a flavoring agent (like vanilla or almond extract), and a tiny pinch of salt to balance sweetness.
- Method: Simply whisk the powdered sugar with just enough liquid to reach the desired consistency. Add liquid very gradually, as a little goes a long long way. Too thin, and it runs off; too thick, and it’s hard to drizzle or spread smoothly. Whisk in flavoring and salt at the end.
- Characteristics: Typically opaque white unless colored or flavored with juice/cocoa. Dries relatively quickly to a matte or slightly shiny finish that is firm but usually not rock hard (it might crackle when cut). Its sweetness level is high. Consistency is highly adjustable by adding more liquid (thinner) or more powdered sugar (thicker).
- Pros: Extremely easy and fast to prepare, uses common pantry staples, very versatile, easily colored with gel pastes, easily flavored with extracts or citrus juices.
- Cons: Can be intensely sweet, flavor can be somewhat one-dimensional without additions, texture isn’t as sophisticated or smooth as cooked glazes.
- Best Uses: Drizzling over scones, muffins, coffee cakes, Bundt cakes, cookies, cinnamon rolls; providing a thin coating for donuts or certain pastries.
Fruit Glazes (Apricot, Raspberry, etc.)
Often used to add shine and preserve fruit on tarts and pastries.
- Key Ingredients: Fruit jam or preserves – traditionally apricot jam is favored for its relatively neutral color and flavor, but raspberry or other clear jellies can also be used. A small amount of liquid like water, fruit juice, or liqueur (like Kirsch) is added to thin it.
- Method: Combine the jam/preserves and liquid in a small saucepan. Gently heat over low heat, stirring constantly, just until the jam melts and the mixture becomes smooth and fluid. Strain the hot glaze through a fine-mesh sieve to remove any seeds, fruit pieces, or clumps – this is crucial for a perfectly clear, smooth finish.
- Characteristics: Translucent, high-gloss finish. Adds the flavor of the fruit used. Slightly sticky texture when set.
- Pros: Creates a beautiful professional sheen, especially on fruit tarts. Helps prevent fresh fruit toppings from drying out or oxidizing. Adds a complementary fruit flavor. Relatively easy to make using store-bought jam.
- Cons: Flavor is dictated by the jam used (choose wisely). Can remain slightly sticky to the touch. Straining is necessary for a clear look.
- Best Uses: Brushing thinly over fresh fruit arranged on tarts; glazing Danish pastries, croissants, or other Viennoiserie after baking for shine; sometimes used as a sealing layer on tart shells before adding cream fillings.
Chocolate Glazes
A broad category covering rich, decadent toppings.
- Ganache-Based Glazes: Ganache (a mixture of chocolate and cream) can be adapted into a pourable glaze.
- Ingredients: Good quality chocolate (dark, milk, or white – chopped finely), heavy cream. The ratio of chocolate to cream determines the final consistency: more cream yields a thinner, runnier glaze; less cream yields a thicker glaze that sets firmer. Sometimes a small amount of butter, corn syrup, or glucose syrup is added for extra shine, fluidity, and to prevent cracking.
- Method: Heat the heavy cream in a saucepan until it just begins to simmer around the edges. Pour the hot cream over the chopped chocolate in a heatproof bowl. Let it sit undisturbed for a few minutes (3-5 mins) to allow the heat to melt the chocolate. Gently whisk, starting from the center and working outwards, until the mixture is completely smooth, homogenous, and glossy. Avoid over-whisking which can incorporate air bubbles. Let the ganache cool slightly, stirring occasionally, until it reaches the desired pouring or dipping consistency (usually lukewarm, around 90-95°F / 32-35°C).
- Pros: Deliciously rich chocolate flavor, beautiful natural gloss (especially when warm), versatile consistency based on ratio, relatively simple ingredients.
- Cons: Requires using good quality real chocolate for best flavor and texture. Can be sensitive to temperature for application (too hot = too thin; too cold = too thick). Sets to a fudgy texture, not a hard shell.
- Best Uses: Glazing entire cakes (creating drips or full coverage), topping cheesecakes or tortes, glazing éclairs, profiteroles, or donuts.
- Simple Chocolate Glazes (Icing Style): Quicker versions often made with cocoa powder, powdered sugar, melted butter, a liquid (milk/water/corn syrup), and vanilla. These behave more like the simple powdered sugar glaze but with chocolate flavor. They are less rich and complex than ganache.
- Mirror Glaze (Glaçage Miroir) – Advanced: This highly specialized glaze creates an incredible, flawless, reflective shine. It typically involves precise cooking of sugar, water, glucose/corn syrup, condensed milk, gelatin, and white or dark chocolate (or cocoa powder/coloring). It must be applied at a very specific temperature over a perfectly smooth, frozen mousse cake or entremet. Status: An advanced technique requiring precision and specific ingredients, usually tackled after mastering other pastry basics.
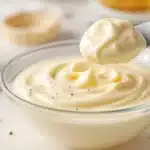
Fondant Icing / Poured Fondant
Not to be confused with rolled fondant used for covering cakes like dough. Poured fondant creates a classic, smooth, opaque shell.
- Ingredients: Primarily composed of very fine sugar crystals suspended in a saturated sugar syrup. Usually involves cooking sugar, water, and corn syrup/glucose to a specific temperature, then cooling and agitating it to promote fine crystallization. Due to the complexity of making it well from scratch, bakers often purchase pre-made poured fondant.
- Method (Using Pre-made): Gently heat the prepared fondant in a heatproof bowl set over a saucepan of simmering water (double boiler). Add a tiny amount of water or simple syrup if needed to achieve a smooth, pourable consistency (like heavy cream). Crucially, do not overheat the fondant (keep it just lukewarm, typically below 100°F / 38°C). Overheating destroys the fine crystal structure and causes the fondant to lose its characteristic shine when set. Once at the correct temperature and consistency, quickly dip the tops of pastries (like petit fours or éclairs) into the fondant or pour it evenly over the item placed on a wire rack. It sets quickly.
- Characteristics: Dries to a perfectly smooth, opaque, firm shell with a beautiful sheen (if handled correctly). It is very sweet.
- Pros: Provides a classic, elegant, perfectly smooth, sealed finish. Looks very professional.
- Cons: Extremely sweet. Can be tricky to work with due to temperature sensitivity and rapid setting time. Making it from scratch is an advanced process. Good quality pre-made fondant can be costly.
- Best Uses: Traditional glazing for petit fours, éclairs, napoleons (mille-feuille), some donuts and cookies.
Royal Icing (Brief Mention)
While sometimes called an icing or glaze, its primary use and texture are different.
- Ingredients: Powdered sugar, egg whites (fresh or meringue powder), often an acid like lemon juice or cream of tartar.
- Characteristics: Dries very hard, matte (not glossy), and opaque.
- Best Uses: Primarily used for detailed cookie decorating (outlining and flooding), creating intricate piped flowers or decorations that need to dry completely hard, or assembling gingerbread houses. Not typically used as an all-over glaze for cakes or soft pastries due to its hardness.
Egg Wash (Pre-Bake “Glaze”)
Applied before baking, not after.
- Ingredients: Beaten whole egg, egg yolk only, or egg white only, often thinned with a teaspoon of milk, cream, or water.
- Purpose: Promotes browning, adds shine, helps toppings adhere, seals pastry edges. Creates a baked-on finish, not a post-bake coating.
Glazing Techniques & Tips for Success
- Consistency Matters: The thickness of your glaze determines how it flows and sets. Adjust liquid carefully – add more liquid for a thinner glaze (drizzling, sheer coating), more powdered sugar/less liquid for thicker results (spreading, opaque coating). Remember glazes thicken as they cool.
- Temperature is Key: Most glazes are best applied when they are slightly warm or lukewarm (around 90-100°F / 32-38°C) and the item being glazed is completely cool. Applying glaze to a warm cake or pastry can cause it to melt, slide off, or be absorbed too much. Poured fondant is especially sensitive – too hot and it loses its shine, too cold and it’s too thick to pour smoothly.
- Prepare the Surface: For the smoothest finish, ensure the cake or pastry surface is relatively free of loose crumbs. Applying a very thin preliminary layer of frosting (a “crumb coat”) and chilling it can create a perfect base for a final glaze on cakes.
- Choose Your Application Method:
- Drizzling: Use a spoon, fork, whisk dipped in glaze, or a piping bag/squeeze bottle with a small opening for fine lines.
- Pouring: Place the item on a wire rack set over a baking sheet (to catch drips!). Pour the glaze confidently over the center, allowing it to flow down naturally. Use an offset spatula minimally only if needed to gently guide the glaze over edges. Avoid over-manipulating.
- Brushing: Use a soft pastry brush for thin applications like fruit glazes or egg washes. Apply even coats; avoid letting glaze pool.
- Dipping: Best for items like éclairs, petit fours, or donuts. Hold the item carefully and dip the top surface smoothly into the bowl of glaze. Lift straight up and let excess drip off cleanly before setting on a rack.
- Allow Setting Time: Give your glaze adequate time to set at room temperature or in the refrigerator (check recipe recommendations based on glaze type) before you handle, stack, or package the items. Ganache will firm up more in the fridge; simple sugar glazes set at room temp.
- Strain for Perfection: For crystal-clear fruit glazes or ultra-smooth ganaches, straining through a fine-mesh sieve before application removes any potential lumps or solids.
Conclusion: The Finishing Flourish
Glazes are the essential finishing touch in the pastry chef’s toolkit, transforming baked goods with shine, color, flavor, and textural contrast. From the simple sweetness of a powdered sugar drizzle to the rich decadence of chocolate ganache, the fruity gloss of an apricot glaze, or the classic shell of poured fondant, each type offers unique possibilities. Understanding their composition, purpose, and proper application – paying close attention to consistency and temperature – allows you to choose and execute the perfect glaze for any creation. Mastering these techniques adds that final layer of polish, turning your homemade treats into visually stunning and irresistibly appealing delights. So go ahead, embrace the glaze craze!