Cream puffs, profiteroles, éclairs, gougères – these delightful pastries share a common foundation: Pâte à Choux (pronounced “pat-a-shoo”), or simply choux pastry. It’s a unique creation in the baking world, known for its ability to puff dramatically in the oven, creating light, airy, mostly hollow shells with a delicate crispness, perfect for filling with sweet creams or savory mixtures. They seem almost magical, products of some complex bakery secret.
But while making perfect choux pastry does require understanding its unique process and paying attention to detail, it’s a skill well within the reach of aspiring home bakers. Many beginners are intimidated, encountering frustrating issues like puffs that stay flat, collapse sadly after baking, turn out soggy, or crack unattractively. Fear not! By understanding the science behind its signature puff, mastering the key steps in its preparation, and learning how to troubleshoot common problems, you too can become a “Choux Champion” and confidently conquer classics like cream puffs and éclairs.
What is Pâte à Choux? (The Twice-Cooked Wonder)
Unlike flaky pastries (like puff pastry or pie crust) that rely on layers of fat, or breads that use yeast, choux pastry is fundamentally different. It’s a cooked dough, unique in that it undergoes two distinct cooking stages:
- Stovetop Cooking: The initial paste (panade) is made by cooking liquid, butter, and flour together on the stovetop. This crucial step gelatinizes the starches in the flour.
- Oven Baking: Eggs are beaten into the cooled paste, which is then piped into shapes and baked in a hot oven.
This double-cooking process is what gives choux its characteristic structure and dramatic puff. Technically, it’s not a “pastry” in the laminated sense, but rather a cooked paste leavened entirely by steam. Its versatility is remarkable, forming the base for:
- Sweet: Cream Puffs (Profiteroles), Éclairs, Crullers (a type of donut), Paris-Brest (ring shape), Croquembouche (tower of cream puffs), Beignets (sometimes).
- Savory: Gougères (cheese puffs), Gnocchi Parisienne, Duchess Potatoes.
The Science of the Puff: Steam Leavening Power
The incredible rise of choux pastry doesn’t come from yeast or baking powder (though a tiny pinch of the latter is sometimes added in modern recipes as insurance, it’s not traditional or necessary). It relies almost entirely on the power of steam.
Here’s the breakdown of how it works:
- Gelatinized Starch Structure: Cooking the flour with liquid and butter on the stovetop causes the starch granules to absorb water and burst, forming a thick, gelatinous paste (the panade). This precooked starch structure is key because it can stretch without breaking.
- Eggs Add Moisture & Structure: Beating eggs into the cooled panade adds significant moisture (essential for steam) and proteins.
- Steam Explosion: When the piped choux paste hits the hot oven, the high water content quickly turns into steam. This rapidly expanding steam pushes forcefully outwards against the stretchy structure created by the gelatinized starches and egg proteins.
- Setting the Shell: As the steam inflates the paste like a balloon, the heat of the oven cooks the egg proteins and further dries the starch structure, causing it to set rigidly around the trapped steam pocket. This results in the characteristic light, mostly hollow interior and crisp outer shell.
Key Ingredients and Their Roles
Understanding what each ingredient contributes helps in troubleshooting and achieving consistency:
- Liquid (Water and/or Milk): Provides the essential moisture that becomes steam for leavening. It also hydrates the flour for starch gelatinization.
- Water Only: Tends to produce a slightly crisper, lighter shell.
- Milk Only: Adds richness, flavor, and tenderness due to milk fat and sugars, and promotes better browning. Shell might be slightly softer.
- Combination (Often 50/50): A common approach to get the benefits of both – some crispness from water, some richness and color from milk.
- Butter: Adds rich flavor, contributes to tenderness and a softer interior, aids slightly in browning, and contains some water (~15-18%) which adds to the steam potential.
- Salt: Essential for flavor balance; enhances the overall taste.
- Sugar (Optional, Small Amount): Even in savory choux like gougères, a tiny pinch of sugar is often added. It primarily aids in achieving better browning (caramelization) and balances the flavor. Too much sugar can negatively affect the puff.
- Flour (All-Purpose or Bread Flour): Provides the starch needed for gelatinization on the stovetop and the protein (gluten) that gives the paste structure and stretchability. All-purpose flour is commonly used and works well. Bread flour, with its higher protein content, can provide slightly more structure, potentially leading to puffs that hold their shape even better, though the difference is often subtle.
- Eggs: These are arguably the most critical ingredient in terms of getting the consistency right. They perform multiple vital functions:
- Add significant moisture for steam.
- Provide richness, flavor, and color (from yolks).
- Contribute vital structure as their proteins coagulate and set during baking.
- Act as emulsifiers (lecithin in yolks), helping create a smooth, stable paste.
- Contribute slightly to leavening through their own expansion.
- The amount of egg added is crucial. It determines the final consistency of the paste. Too little egg results in a stiff paste that won’t puff properly and may taste dry. Too much egg results in a runny paste that won’t hold its shape when piped and leads to flat, collapsed puffs.
Making Perfect Choux Paste: Step-by-Step
Precision and following the steps carefully are key to successful choux.
- Heat Liquids & Fat: In a medium saucepan, combine your liquid(s) (water and/or milk), cubed butter, salt, and sugar (if using). Place over medium heat and bring the mixture to a full rolling boil. Ensure the butter is completely melted before it boils vigorously.
- Add Flour (All At Once): As soon as the mixture reaches a rolling boil, immediately remove the saucepan from the heat. Dump all of the flour into the hot liquid at once.
- Beat Vigorously: Stir immediately and vigorously with a sturdy wooden spoon or heatproof spatula. Mix energetically until the flour fully absorbs the liquid and the mixture comes together into a thick, cohesive paste or dough ball that pulls away cleanly from the sides of the pan. This should happen relatively quickly (30-60 seconds).
- Cook the Paste (The Dessécher Step): Return the saucepan to low or medium-low heat. Continue to cook the paste, stirring, smearing, and turning it over constantly, for about 1 to 3 minutes. The goal here is to slightly cook the flour further and, more importantly, to evaporate some excess moisture. You might see a thin film forming on the bottom of the pan (a sign you’re doing it right). Don’t let it brown, just cook and dry it slightly. This step is crucial for ensuring the pastry puffs properly and doesn’t end up soggy. The finished paste should look smooth and perhaps slightly glossy.
- Cool Slightly: Transfer the hot paste immediately to the bowl of a stand mixer fitted with the paddle attachment, or into a sturdy mixing bowl if you plan to incorporate eggs by hand. Let the paste cool for 5-10 minutes. You can beat it on low speed (or stir occasionally by hand) to help release steam and speed cooling. It should cool down enough so that it won’t scramble the eggs when they’re added – typically warm to the touch, below 140°F (60°C).
- Incorporate Eggs (Gradually & Judiciously): This is where careful attention is most needed. Lightly beat your eggs in a separate bowl or measuring cup first. With the mixer on low speed (or while beating vigorously with a wooden spoon by hand), begin adding the beaten eggs a small amount at a time (perhaps one egg’s worth, or even less, per addition). Crucially, wait until each addition is fully incorporated into the paste before adding the next. The paste might look like it’s separating or splitting initially, but keep mixing, and it will come back together into a smooth paste. Scrape down the sides and bottom of the bowl frequently.
- Check for Correct Consistency: You may not need to add all the egg specified in the recipe. The goal is a specific consistency: the final choux paste should be smooth, thick, and glossy. When you lift the paddle or spoon, the paste should slowly fall off in a thick ribbon or form a distinct “V” shape that holds for a few seconds before dropping. If the paste is too stiff (doesn’t form a V), add a tiny bit more beaten egg and mix again. If the paste becomes too runny (slides off the spoon quickly), you’ve unfortunately added too much egg, and it likely won’t hold its shape or puff properly (adding more flour at this stage doesn’t work well). It’s always better to err on the side of slightly stiffer and add egg cautiously than to make it too wet.
Piping and Baking Choux Perfection
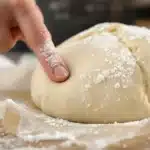
- Piping: Use the choux paste while it’s still slightly warm or at room temperature (it’s easier to pipe than when cold). Transfer it to a piping bag fitted with your desired tip (e.g., a large plain round tip, ~1/2 inch, for cream puffs/profiteroles; a large French star tip for éclairs or decorative puffs). Pipe your shapes onto baking sheets lined with parchment paper or a silicone mat, leaving ample space between them as they will puff considerably. For puffs, pipe mounds. For éclairs, pipe straight logs (often 4-5 inches long). Smooth down any little peaks on top with a fingertip dipped in water to prevent burning.
- Optional Egg Wash: A light brush of egg wash (egg beaten with a splash of water or milk) can add extra shine and deeper color, but isn’t strictly necessary. Apply gently.
- Baking Strategy (The Heat Dance): Choux requires careful temperature management:
- Initial High Heat: Start baking in a preheated hot oven, typically 400°F to 425°F (200°C to 220°C), for the first 10-15 minutes. This intense heat rapidly converts the moisture into steam, causing the pastry to puff up quickly and dramatically.
- Reduce Heat: After the initial puffing phase, lower the oven temperature significantly, usually to 350°F to 375°F (175°C to 190°C). Continue baking at this lower temperature for the remaining time (total baking time might be 25-40 minutes depending on size). This allows the structure to set fully and the shells to dry out thoroughly from the inside out, ensuring they become crisp and don’t collapse upon cooling.
- NO PEEKING (Early On): It’s critical not to open the oven door during the first 15-20 minutes (the main puffing stage). A sudden drop in temperature can cause the delicate, steam-filled structures to collapse irreversibly.
- Venting Steam (Optional but Helpful): Once the puffs are well-risen, set, and starting to brown nicely (usually after about 20-25 minutes total bake time), you can help ensure a dry interior by venting. Quickly remove the baking sheet, poke a small hole in the side or bottom of each puff with a sharp paring knife or skewer, and return them to the oven for the remainder of the baking time. Alternatively, some bakers just prop the oven door slightly ajar for the last 5-10 minutes.
- Doneness Cues: Perfectly baked choux should be: noticeably light for their size, deeply golden brown all over (not just pale gold), feel firm and dry to the touch, and sound hollow when tapped gently on the bottom. When in doubt, bake them a little longer at the lower temperature; under-baked choux is the primary cause of collapse.
- Cooling: Immediately transfer the baked puffs from the baking sheet to a wire cooling rack. This allows air to circulate and prevents steam from making the bottoms soggy. Cool completely before filling.
Troubleshooting Common Choux Problems
- Flat Puffs (Didn’t Rise): Most likely culprit is dough too wet (too much egg added). Other causes: oven not hot enough initially, oven door opened too early, possibly insufficient drying of the paste on the stovetop.
- Collapsed Puffs (After Baking): Classic sign of under-baking. The structure wasn’t set/dry enough to support itself as it cooled. Solution: Bake longer at the lower temperature. Try venting steam towards the end of baking.
- Soggy Bottoms / Insides: Also related to under-baking and insufficient drying. Ensure thorough baking and proper cooling on a wire rack. Venting helps.
- Excessive Cracking: Minor cracking is normal as the pastry expands. Large, deep cracks might indicate the oven temperature was too high initially, too much egg wash was applied, or the dough consistency was slightly off.
- Paste Too Stiff: Didn’t add enough egg (stop adding based on consistency, not just recipe amount); maybe cooked slightly too long on the stovetop. Puffs might rise but be small and dense.
- Paste Too Runny: Added too much egg. Unfortunately, very difficult to fix. Results in flat, spread-out puffs. Be more cautious adding the last bit of egg next time.
Conclusion: Claim Your Choux Champion Title
Pâte à Choux, the foundation for so many delightful pastries, might seem complex with its unique double-cooking method. However, by understanding the crucial role of steam for leavening, the importance of cooking the initial paste correctly on the stovetop, the critical step of adding just the right amount of egg to achieve the perfect consistency, and employing a smart two-stage baking strategy, you can reliably conquer this classic French pastry.
Don’t be discouraged by initial imperfections. Pay close attention to the visual and textural cues of the paste, resist the urge to open the oven door too soon, and bake your puffs until they are truly golden brown and firm. With practice and attention to these key details, you’ll move beyond uncertainty and be well on your way to becoming a true Choux Champion, confidently creating perfect cream puffs, elegant éclairs, and more!