You’ve carefully selected your baking tools, maybe even invested in a few quality pieces. You’re excited to use them to create delicious breads, cakes, and cookies. But the journey with your essential gear doesn’t end once you’ve bought it. To ensure your tools perform their best and last for years to come, regular cleaning and proper maintenance are absolutely crucial. It might seem like a chore, but neglecting this aspect can lead to frustrating problems down the line.
Improper care can shorten the lifespan of your favorite pans, compromise the effectiveness of nonstick coatings, lead to rust or warping, harbor bacteria, and even negatively impact the taste and appearance of your baked goods. Think of maintenance not just as cleaning, but as protecting your investment and ensuring your baking partners continue to work reliably. This guide provides practical advice on how to clean and maintain common baking tools and equipment, helping your essential gear stay in top shape for many baking adventures ahead.
Why Bother? The Importance of Gear Maintenance
Taking a few extra minutes to care for your tools after each use pays off significantly in several ways:
- Longevity & Cost Savings: This is the most obvious benefit. Proper cleaning prevents rust on metal pans, stops nonstick coatings from degrading prematurely, keeps wooden tools from cracking, and prevents general wear and tear. Well-maintained gear lasts exponentially longer, saving you the cost and hassle of frequent replacements.
- Optimal Performance: Clean tools simply work better. A well-cared-for nonstick pan releases food easily. A clean baking sheet heats more evenly than one with burnt-on residue. A smooth wooden rolling pin glides effortlessly. Consistent performance from your tools leads to more consistent baking results.
- Food Safety: Cracks, scratches, rust spots, and built-up food residue can become breeding grounds for bacteria or mold. Rancid fats or oils trapped in crevices or on surfaces can contaminate fresh food. Regular, thorough cleaning is essential for ensuring the food you prepare is safe to eat.
- Better Tasting & Looking Results: Lingering residues or strong odors from previous uses (like garlic on a cutting board or burnt grease on a pan) can transfer unwanted flavors to your delicate baked goods. Clean equipment ensures pure flavors shine through. Properly functioning gear also contributes to better browning and appearance.
- Pride in Your Craft: Taking care of your tools, whether simple or sophisticated, fosters a sense of respect for the baking process and pride in your equipment. It’s part of being a dedicated baker.
Cleaning & Care by Material/Tool Type
Different materials require different approaches. Here’s a breakdown for common baking gear:
Metal Bakeware (Aluminum, Stainless Steel, Aluminized Steel)
These are the workhorses, often made of light-colored aluminum or sometimes stainless or aluminized steel.
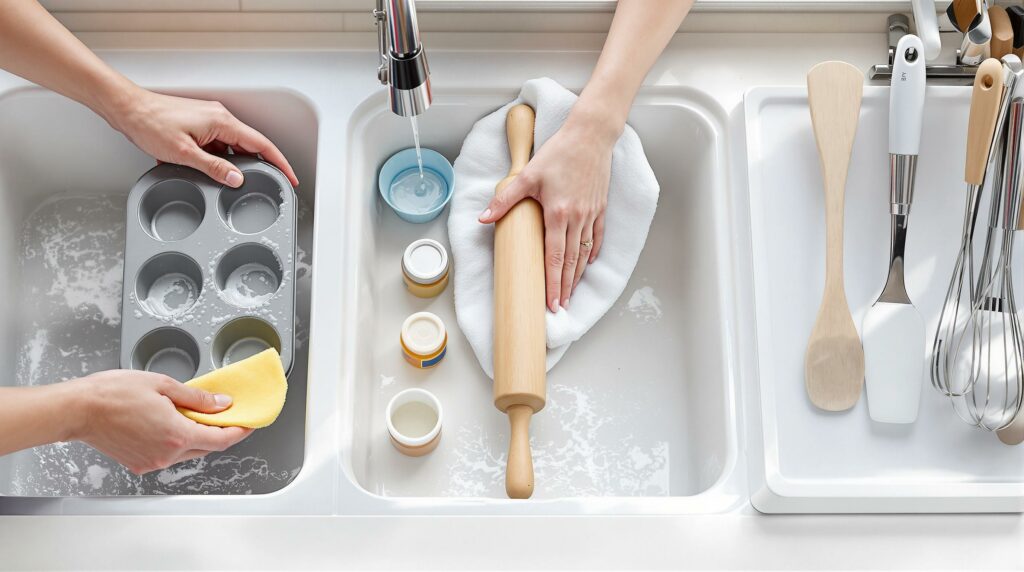
- Cleaning: The safest bet is usually hand washing with warm water, mild dish soap, and a non-abrasive sponge or nylon brush. While some sturdy stainless or aluminized steel pans might tolerate dishwashers, harsh detergents can sometimes discolor or dull natural aluminum finishes over time.
- Stubborn Bits: For baked-on food, soak the pan in warm soapy water for a while before scrubbing gently. For tough stains or discoloration on natural aluminum or stainless steel, a paste of baking soda and water can often help lift them without harsh scratching. Avoid steel wool or overly abrasive scouring pads, especially on aluminum.
- Drying: Dry thoroughly immediately after washing, especially pans with rolled edges where water can get trapped and potentially lead to rust (if steel is exposed) or mineral buildup.
- Warping Prevention: Avoid drastic temperature changes, like putting a very hot pan directly into cold water, which can cause metal to warp. Choosing heavy-gauge, quality pans also makes them less prone to warping from high oven heat.
Nonstick Bakeware
Requires careful handling to preserve the delicate coating.
- Cleaning: Hand wash ONLY, regardless of whether it says “dishwasher safe.” Dishwasher detergents are extremely harsh and contain abrasive agents that will rapidly degrade the nonstick coating, drastically shortening its lifespan. Use only mild dish soap and soft sponges or cloths. Never use steel wool, abrasive scouring pads, or harsh chemical cleaners.
- Utensils: This is critical! Use only wood, silicone, rubber, or nylon utensils with nonstick surfaces. Metal forks, knives, spatulas, or whisks will scratch the coating immediately, rendering it ineffective and potentially unsafe.
- Storage: Avoid stacking nonstick pans directly. If you must stack them, place a soft cloth, paper towel, or specialized pan protector between each piece to prevent the coating from getting scratched by the pan above or below it.
- Heat & Sprays: Avoid using nonstick pans under the broiler or at extremely high temperatures (check manufacturer’s limits). Many manufacturers also recommend avoiding aerosol cooking sprays (like PAM), as the propellants can build up over time, creating a sticky residue that’s hard to remove and counterintuitively makes the pan less nonstick. Use butter, oil, or parchment paper for greasing instead.
- When to Replace: Once the nonstick coating is significantly scratched, peeling, or flaking, it’s time to replace the pan for performance and safety reasons.
Glass & Ceramic Bakeware
Known for heat retention but requires careful handling.
- Cleaning: Most glass (like Pyrex) and ceramic bakeware is dishwasher safe, but check manufacturer instructions. Hand washing with standard dish soap and a non-abrasive sponge will prevent potential etching or dulling over time. For baked-on food, soaking is effective. Baking soda paste can help with stubborn stains.
- Thermal Shock Prevention: This is the most important consideration. These materials cannot handle rapid temperature changes. Never take a hot glass or ceramic dish from the oven and place it on a cold countertop (especially granite or tile), a wet surface, or immerse it in cold water. Similarly, don’t take a dish directly from the freezer or refrigerator and put it straight into a hot oven. Allow dishes to cool gradually on a wire rack, trivet, or dry towel before washing or storing. Sudden temperature shifts can cause them to crack or even shatter.
- Storage: Handle carefully to avoid chipping the edges or cracking the dish. Avoid stacking heavy items inside them.
Silicone Bakeware & Tools
Flexible and nonstick, but with their own care needs.
- Cleaning: Generally very easy to clean due to their nonstick nature. Warm soapy water and a soft sponge usually suffice. Most silicone items are dishwasher safe (top rack recommended). Pay attention to intricate molds to ensure all residue is removed. Oily residues can sometimes build up over time, requiring thorough washing.
- Stains & Odors: Silicone can occasionally absorb strong food odors (like garlic) or become stained by deeply colored ingredients (like tomato sauce or vibrant food dyes). Soaking in a solution of water and baking soda or white vinegar might help mitigate this. Washing promptly after use with strongly colored or greasy foods is advisable.
- Handling: While durable in terms of temperature, silicone is easily damaged by sharp objects. Never use knives or other sharp utensils to cut items directly in a silicone pan or mold. Avoid abrasive scouring pads. Always remember to place flexible silicone bakeware on a solid metal baking sheet before filling and baking for stability.
Cast Iron (Bare & Enameled)
Requires distinct care depending on the type.
- Bare Cast Iron: Needs seasoning (a baked-on layer of oil) to protect it from rust and create a naturally non-stick surface. Clean primarily with hot water and a stiff brush or specialized cast iron scrubber – avoid soap generally as it can strip the seasoning. For stuck-on bits, you can use coarse salt as an abrasive or boil water in the pan. Dry immediately and thoroughly (heating briefly on the stovetop is effective). Apply a very thin coat of cooking oil while still warm. Never soak bare cast iron or put it in the dishwasher. Store in a dry place.
- Enameled Cast Iron (e.g., Dutch Ovens): Much easier care! The enamel coating eliminates the need for seasoning and protects from rust. Hand wash with warm soapy water and a non-abrasive sponge or nylon brush. Avoid metal scouring pads which can scratch the enamel finish. For stubborn stains or discoloration, soaking or using a specialized enamel cleaner (check manufacturer’s recommendations) can help. Dry thoroughly. While more resistant than bare cast iron, still try to avoid extreme temperature shocks.
Wooden Tools (Spoons, Rolling Pins, Cutting Boards)
Wood requires special care to prevent damage.
- Cleaning: Hand wash only with warm water and mild soap right after use. Never soak wooden items in water – this causes the wood to swell, warp, crack, and potentially harbor bacteria as it dries unevenly.
- Drying: Towel dry immediately and thoroughly after washing. Let them air dry completely in a well-ventilated spot before storing.
- Maintenance: To prevent drying, splitting, or cracking, periodically treat wooden tools (especially rolling pins and cutting boards) with food-grade mineral oil or a specialized wood butter/conditioner containing beeswax. This replenishes moisture and creates a protective barrier.
- Dishwasher is Forbidden: The intense heat, prolonged moisture exposure, and harsh detergents in a dishwasher will quickly ruin wooden tools.
Small Tools (Whisks, Spatulas, Scrapers, Measuring Tools)
- Cleaning: Most tools made entirely of stainless steel, sturdy plastic, or silicone are dishwasher safe (use the top rack for plastics and silicone if unsure). However, hand wash any tools with wooden handles or delicate mechanisms. Pay attention to cleaning where spatula heads or whisk wires meet the handle, as food can get trapped there.
- Storage: Store whisks carefully to avoid bending the wires (hanging is often best). Protect the sharp edges of metal bench scrapers. Ensure measuring tools are fully dry before storing.
Electric Mixers (Hand & Stand)
- Cleaning: Always unplug the mixer first! Wipe down the main body (motor housing) and cord with a damp cloth – never submerge the motor unit in water. Removable beaters, whisks, dough hooks, and bowls are usually dishwasher safe, but check your manufacturer’s manual to be sure. Hand washing attachments may prolong their life. Ensure all attachments are completely dry before storing to prevent rust or water spots. Carefully clean any ventilation slots on the motor housing with a dry brush or cloth.
- Maintenance: Periodically inspect the power cord for any signs of damage or fraying. Listen for any unusual grinding or straining noises from the motor during operation. Consult your owner’s manual for any specific long-term maintenance recommendations (most home models require little beyond cleaning). Avoid consistently overloading the motor, especially with hand mixers attempting heavy dough.
General Maintenance Habits for Longevity
- Clean Promptly: The longer food sits on pans and tools, the harder it is to remove. Try to wash or at least soak items soon after use.
- Use Tools Appropriately: Don’t use metal utensils on nonstick surfaces, knives inside pans, or abrasive cleaners on delicate finishes.
- Store Smart: Avoid carelessly stacking pans that can scratch each other; use protectors if needed. Store tools where they won’t get bent, chipped, or lost. Ensure everything is stored completely dry.
- Read the Manual: When you get a new piece of bakeware or equipment, take a moment to read the manufacturer’s care and use instructions. They often contain specific valuable tips.
Conclusion: Protect Your Partners in Baking
Your baking tools and equipment are more than just objects; they are your partners in creation. Treating them with care through proper cleaning and maintenance isn’t just a tedious chore – it’s a smart investment. It ensures your gear lasts longer, performs reliably, keeps your food safe, and ultimately helps you achieve better baking results.
By understanding the specific needs of different materials – the gentle hand washing required for nonstick and wood, the importance of thorough drying for metals, the caution needed with glass and ceramic, and the resilience yet specific care for silicone and cast iron – you can establish simple routines that make a big difference. Take pride in your tools, keep them clean and well-maintained, and they will reward you with many years of faithful service and delicious baked goods.

