You’ve carefully mixed your ingredients, perhaps patiently nurtured a sourdough starter, maybe even expertly kneaded or folded your dough through its bulk fermentation. It’s alive, bubbly, and full of potential. Now comes a truly transformative step, one that bridges the gap between a lively blob of dough and a loaf ready to achieve its full glory in the oven: Shaping.
For many aspiring artisan bakers, shaping can be one of the most intimidating parts of the process. Dough, especially higher hydration dough, can feel sticky, slack, and uncooperative. How do you wrestle it into that perfect round boule or elegant long baguette without deflating all the precious gas you worked so hard to cultivate? Handling the dough too roughly can destroy its structure, while being too timid can lead to loaves that spread flat instead of rising tall. Welcome to Shaping School, where we’ll demystify the techniques and, more importantly, the purpose behind shaping, giving you the insights and confidence to handle your dough effectively and create beautifully formed loaves.
More Than Just Looks: Why Proper Shaping Matters
Shaping artisan bread dough is far more than just making it look like a loaf before it proofs. It performs several critical functions that directly impact the final bread’s volume, structure, crumb, and appearance:
- Creating Surface Tension (The “Skin”): This is arguably the primary goal. Proper shaping involves gently stretching the outermost layer of the dough and tucking it underneath, creating a taut, continuous “skin” around the entire loaf. This surface tension acts like an invisible net, helping the dough maintain its shape during the final proof and, crucially, encouraging it to rise upwards (oven spring) in the oven, rather than spreading outwards like a pancake.
- Building Internal Structure: The folding and tightening actions involved in shaping help to further organize and align the gluten network developed during mixing and bulk fermentation. This provides additional internal support, contributing to a stronger structure that can hold the gas produced during the final proof and baking, leading to a better overall crumb.
- Gentle Degassing for Uniformity: As you handle and fold the dough during shaping, you gently press out some of the largest, most irregular gas bubbles that formed during bulk fermentation. This redistribution of gas helps encourage a slightly more uniform (though still potentially open, depending on the style) crumb structure, preventing massive, undesirable tunnels or “caves” in the final loaf. The key here is gentle – you don’t want to completely deflate the dough.
- Influencing Crumb Pattern: The specific way you fold, roll, and tighten the dough can subtly influence the direction and pattern of the final crumb structure.
- Preparing for Scoring: A loaf with a well-developed, taut surface tension provides the perfect canvas for scoring (cutting the top before baking). The tension allows the score marks to open cleanly and controllably in the oven, creating an “ear” and contributing to the loaf’s aesthetic appeal. A slack, poorly shaped loaf won’t score well.
The Two-Step Process: Pre-shaping & Benching vs. Final Shaping
Many artisan bread recipes, especially those dealing with wetter doughs or multiple loaves, employ a two-stage shaping process. Understanding this approach can significantly improve your results:
1. Pre-shaping:
- What it is: Immediately after bulk fermentation (and after dividing the dough if making more than one loaf), the dough portions are gently formed into loose, basic shapes – usually rough rounds or sometimes oblongs. Less tension is created here compared to the final shape.
- Purpose:
- To gently organize the dough structure and begin evening out gas distribution after the bulk rise or division.
- To start creating some surface tension, making the dough easier to handle later.
- To give the dough a uniform shape before its rest period.
2. Benching (Bench Rest):
- What it is: After pre-shaping, the dough pieces are covered (with plastic wrap, a bowl, or a cloth) and allowed to rest directly on the work surface (the “bench”) for a short period, typically 15 to 30 minutes.
- Purpose: During pre-shaping and dividing, the gluten network tightens up. The bench rest allows these gluten strands to relax, making the dough more pliable and extensible (stretchy). This relaxation is crucial for performing the final shaping effectively without tearing the dough’s surface skin. Trying to tightly shape dough immediately after pre-shaping often results in tearing.
3. Final Shaping:
- What it is: After the bench rest, the relaxed dough is definitively shaped into its intended final form (e.g., a tight round boule, a long baguette, an oval bâtard). This step involves more deliberate folding and tensioning to create that crucial taut outer skin.
- Purpose: To build the final structure and strong surface tension needed to support the loaf through the final proof and maximize oven spring.
While some simpler or lower-hydration dough recipes might skip the formal pre-shape and bench rest, incorporating this two-step process is highly beneficial for most artisan styles, especially those with higher hydration or when aiming for specific shapes.
Enrolling in Class: Shaping Techniques Step-by-Step
Let’s walk through the basic steps for two common artisan shapes. Remember to use flour on your hands and work surface sparingly – just enough to prevent unmanageable sticking. Too much incorporated flour will dry out your dough. A bench scraper is your best friend here!
Shaping a Boule (Round Loaf)
This technique focuses on creating tension by folding and dragging.
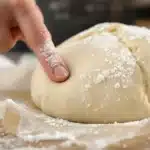
- Prepare: Gently release your rested dough (either after bulk or bench rest) onto a lightly floured surface. If it was pre-shaped, place it seam-side up. Gently pat or press the dough down slightly to degas the largest bubbles – don’t flatten it completely.
- Fold Edges In: Imagine the dough is roughly square. Gently stretch and fold the top edge down towards the center. Press lightly. Fold the bottom edge up towards the center, slightly overlapping the first fold. Press lightly. Repeat for the right and left sides, folding them towards the center. You’re essentially creating a package, enclosing the rougher parts inside.
- Flip: Using your bench scraper or floured hands, carefully flip the dough package over so the smooth side is now facing up and the seams are underneath.
- Create Tension: Cup your hands loosely around the sides and back of the dough ball. Gently drag the dough towards you across a short patch of unfloured (or very lightly floured) countertop. The slight friction between the dough and the surface will catch the bottom edge and tighten the dough’s outer “skin” as you pull.
- Rotate and Repeat: Rotate the dough ball about 90 degrees (a quarter turn) and repeat the gentle dragging motion towards you. Continue rotating and dragging a few times until the surface of the dough feels taut and smooth, and it holds a distinct round shape. You should feel the tension building. Be gentle but firm – don’t tear the skin.
- Final Seal: If needed, gently pinch the seam on the bottom of the boule closed.
- Transfer: Carefully lift the shaped boule (using your bench scraper can help) and place it seam-side UP into a well-floured proofing basket (banneton) or a bowl lined with a heavily floured kitchen towel (a 50/50 rice flour/AP flour mix works great for preventing sticking). The seam side is up so that when you invert it for baking, the smooth, taut side becomes the top of your loaf. Proceed to final proofing.
Shaping a Baguette (Long Loaf) – Simplified Approach
Achieving a true artisan baguette shape and crumb requires specific handling, but this method provides a basic log shape. Works best with doughs that aren’t excessively wet.
- Prepare: Start with your rested dough, pre-shaped into a loose rectangle or oval, on a lightly floured surface. Gently press out any huge gas bubbles. Orient the rectangle so a long side is facing you.
- First Fold (Top Down): Take the long edge furthest from you and fold it down about one-third of the way towards the center of the rectangle. Use your fingertips or the heel of your hand to gently press along the seam to seal it slightly.
- Second Fold (Bottom Up): Now take the new bottom edge (which is the folded edge) and fold it upwards again, perhaps slightly overlapping the center or meeting the top edge. Press gently along this new seam to seal. You should now have a thicker log or cylinder.
- Final Seal & Tension: Fold the top edge down one last time to meet the bottom edge, fully enclosing the previous folds. Use the heel of your hand or your fingertips to press firmly along this final seam, sealing it tightly. This sealing action helps create surface tension.
- Elongate: Place your cupped hands on the center of the log. Gently roll the dough log back and forth, applying slight pressure outwards from the center towards the ends. Continue rolling and elongating until the baguette reaches your desired length (often determined by the length of your baking stone or pan). Try to maintain an even thickness along the length.
- Transfer: Carefully lift the shaped baguette and place it seam-side DOWN onto a heavily floured baker’s couche (a piece of heavy linen canvas used for proofing baguettes), into a specialized baguette pan, or onto parchment paper. If using a couche or parchment, you may need to create folds or supports between multiple loaves to help them keep their shape during the final proof.
Handling Tips for Shaping Success
- Flour Wisely: Use the minimum amount of flour needed on your hands and surface to prevent sticking during the folding/shaping process. Too much flour incorporated into the dough = dry bread. However, use sufficient flour under the dough during the final tensioning drag (for boules) or on your proofing basket/couche to prevent sticking during the final proof. Rice flour blends are excellent for dusting proofing surfaces.
- Gentle but Firm: Develop a confident touch. You need to be firm enough to create tension and structure, but gentle enough not to tear the dough’s skin or completely deflate it.
- Work Efficiently: Especially with wetter doughs that tend to spread, work purposefully and have a clear plan for your folds and shaping motions. Don’t overhandle the dough.
- Degas Appropriately: Gently pressing out the very largest bubbles during initial folds is fine, but avoid aggressively punching down or flattening the dough, as this removes too much gas needed for a good crumb.
- Use Your Bench Scraper: It’s invaluable for lifting, turning, dividing, and cleaning up sticky dough with minimal added flour.
- Practice, Practice, Practice: Shaping is a tactile skill improved through repetition. Don’t be discouraged if your first loaves aren’t perfectly shaped. Watch videos of experienced bakers, pay attention to how the dough feels, and keep practicing. You will get better!
Shaping and the Final Crumb
Remember that how you shape directly impacts the final loaf:
- A tightly shaped loaf with good surface tension will generally hold its form better, rise higher in the oven (better oven spring), and allow scores to open more beautifully. The crumb might be slightly more controlled.
- A loosely shaped loaf lacks the tension to support a dramatic rise and may spread outwards more. The crumb might be more irregular, potentially with larger holes if fermentation was vigorous, but the overall loaf structure might be weaker.
- Consistency in shaping (if making multiple loaves) helps ensure they all bake evenly and have similar characteristics.
Conclusion: Graduate with Confidence
Shaping is far more than creating a pleasing form; it’s a functional step critical for building the structure and surface tension your artisan loaf needs to achieve a magnificent rise and beautiful crumb. Understanding the purpose behind the pre-shape, bench rest, and final, tension-building shape empowers you to handle your dough with intention.
Mastering basic shapes like the boule and developing a feel for creating that taut outer skin takes practice, especially with wetter doughs. Be patient with yourself, use your tools (like that bench scraper!) effectively, don’t be afraid to use flour strategically during shaping (but minimally otherwise), and observe how the dough responds to your touch. With each loaf you shape, your confidence and skill will grow, allowing you to transform that promising fermented dough into beautifully formed loaves poised for baking perfection. Congratulations – you’ve graduated from Shaping School!


