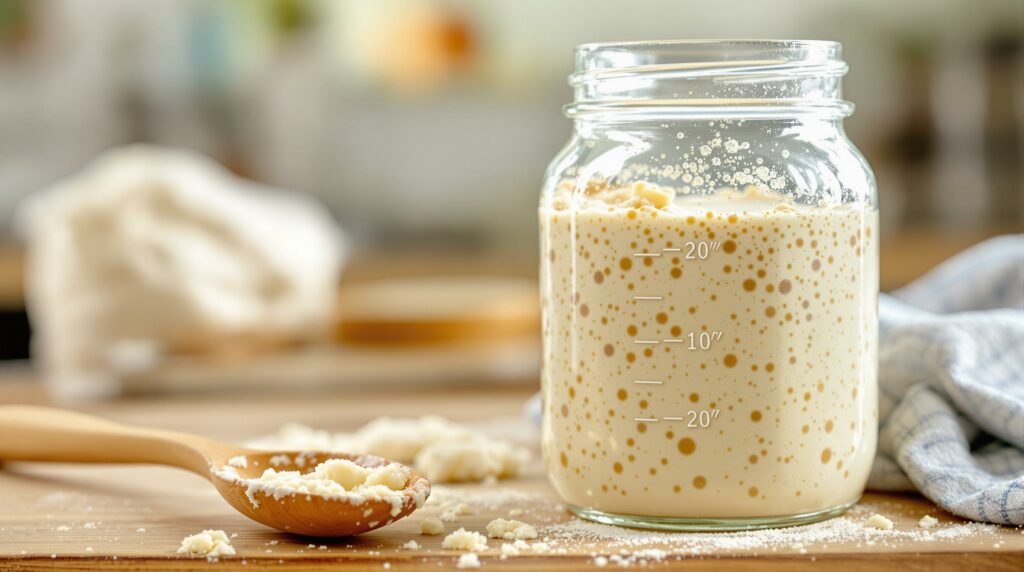
There’s a certain magic surrounding sourdough bread – that distinctive tangy flavor, the satisfyingly chewy texture, the beautifully blistered, crackling crust. It represents a connection to ancient baking traditions and offers unparalleled depth of flavor. At the very heart of this magic lies the sourdough starter, a living, bubbling mixture of flour and water that seems almost alchemical. But for many aspiring bakers, the idea of creating and maintaining a starter feels incredibly intimidating. Is it complicated? Does it require constant attention? Is it easy to accidentally “kill”?
The internet is filled with complex instructions and sometimes conflicting advice, making sourdough seem like an exclusive club for only the most dedicated bakers. But here’s the secret: starting and maintaining a sourdough starter can be surprisingly straightforward. It requires patience and observation more than complex skills. This guide aims to demystify the process, offering a simplified, step-by-step approach to creating your own vibrant starter from scratch and keeping it happy and active for delicious bread baking, proving that you don’t need to be a wizard, just consistent.
What Is a Sourdough Starter, Anyway? (The Simple Science)
Before we begin, let’s quickly understand what a sourdough starter actually is. Unlike the predictable packets of commercial yeast, a starter is a dynamic, living ecosystem. It’s a symbiotic culture containing two main types of microorganisms happily co-existing in a simple flour-and-water paste:
- Wild Yeasts: These are various strains of yeast naturally present on the bran of flour grains, in the air, on your hands, and even on your kitchen utensils. Like commercial yeast (Saccharomyces cerevisiae), their primary job in bread is leavening – they consume sugars derived from the flour’s starches and produce Carbon Dioxide (CO2) gas, which makes the dough rise.
- Lactic Acid Bacteria (LAB): These beneficial bacteria (similar to those found in yogurt or sauerkraut) also feed on the flour’s components. Their main contribution is flavor. They produce lactic acid (which gives a milder, yogurt-like tang) and acetic acid (which provides a sharper, more vinegary tang). These acids are responsible for sourdough’s characteristic sourness and also help to naturally preserve the starter and the final bread by lowering the pH.
These two groups live together synergistically. The LAB create an acidic environment that favors certain wild yeasts and inhibits mold or undesirable bacteria. The yeasts produce CO2 and other compounds. This balanced community is what gives sourdough its unique leavening power and complex flavor profile that simply cannot be replicated with commercial yeast alone. You’re essentially cultivating a tiny, wild fermentation farm in a jar!
Creating Your Starter From Scratch: A Step-by-Step Guide
The process of capturing and nurturing these wild microbes takes time, typically around 7 to 14 days, though sometimes longer depending on your environment and flour. Patience and consistency are your most important ingredients here.
What You’ll Need:
- Flour: Start with whole wheat or whole rye flour. These whole grain flours contain more bran and germ, which naturally harbor a greater diversity and quantity of wild yeasts and bacteria, giving your starter a stronger beginning. For subsequent feedings, unbleached all-purpose or bread flour is typically used. Unbleached is preferred as the bleaching process can sometimes damage microbes.
- Water: Use filtered or dechlorinated water. Chlorine in tap water can inhibit microbial activity. You can easily dechlorinate tap water by letting it sit out in an open container overnight, or by boiling it for a few minutes and letting it cool completely. Use lukewarm water (around 75-80°F / 24-27°C) for feedings, as this encourages activity.
- Container: A clean glass jar is ideal, as it allows you to easily see the activity (bubbles, rising). A quart (approx. 1 liter) jar provides ample room for expansion. You need a loose-fitting lid (like resting the lid on top without screwing it down) or a breathable cover (like cheesecloth or a coffee filter secured with a rubber band). This allows CO2 to escape but prevents the starter from drying out and keeps contaminants out.
- Digital Kitchen Scale: Essential! Measuring flour and water by weight ensures accurate and consistent ratios, which is crucial for starter health. Aim for equal parts by weight.
- Spatula or Spoon: For mixing thoroughly.
The Daily Process (Example Schedule): Remember: This is a guideline. Observe your starter’s specific cues.
- Day 1: Initial Mix
- In your clean jar, combine equal weights of whole grain flour (whole wheat or rye) and lukewarm water. A good starting amount is 60 grams (about 1/2 cup) flour + 60 grams (about 1/4 cup) water.
- Mix thoroughly with your spatula until no dry flour remains. The consistency should be like a thick paste or wet dough.
- Scrape down the sides of the jar. Cover loosely.
- Place the jar in a consistently warm spot, ideally between 70-77°F (21-25°C). Your oven with the light on (and door slightly ajar if it gets too warm) or on top of the refrigerator might work. Avoid drafty areas. Leave it undisturbed for 24 hours.
- Day 2: Observation (Rest)
- Take a look. You might see a few tiny bubbles, or perhaps nothing at all. It might smell slightly ‘floury’ or perhaps a bit ‘off’ – this is normal as various microbes compete initially. Just leave it covered in its warm spot. No feeding today.
- Day 3: First Feeding (Switching Flour)
- You may or may not see much activity yet. Regardless, it’s time for the first feeding.
- Discard about half of the starter mixture (you can just eyeball it or weigh it – discard approx. 60g). Discarding seems wasteful, but it’s crucial to manage acidity and keep the microbe population fed without creating a massive amount of starter.
- To the remaining starter in the jar, add equal weights of unbleached all-purpose or bread flour and lukewarm water (e.g., 60g flour + 60g water). Using white flour now makes it easier to see bubble activity and tends to favor the yeast strains desirable for bread.
- Mix thoroughly, scrape down the sides, cover loosely, and return to its warm spot for another 24 hours.
- Day 4-7 (and beyond): Establishing a Rhythm
- Now, observation becomes key. Start looking for clearer signs of life:
- Bubbles: More noticeable bubbling throughout the mixture.
- Expansion: The starter should increase in volume after feeding, potentially doubling or even tripling, then falling back down as it consumes its food. Mark the side of the jar with a rubber band after feeding to track the rise.
- Aroma: The smell should start evolving from just floury or slightly funky to something more pleasant – perhaps yeasty, tangy, fruity, or slightly vinegary.
- Feeding Schedule:
- If you see little or no activity by Day 4 or 5: Don’t panic! It might just need more time or a slightly warmer spot. Continue feeding once a day (discard half, add 60g flour/60g water) until activity reliably increases.
- If you see clear signs of activity (doubling or more between feedings): This is great! It’s time to increase feeding frequency to twice a day, roughly every 12 hours (e.g., morning and evening). This provides more consistent food and keeps the yeast and bacteria vigorous. Each feeding follows the same process: discard most (leave maybe 30-60g), feed with fresh flour/water (e.g., 60g each).
- Now, observation becomes key. Start looking for clearer signs of life:
- Signs of Maturity (Ready to Bake? Usually 1-2 Weeks):
- Your starter is likely ready, or very close, when it reliably doubles (or more) in volume within 4-8 hours after feeding at room temperature.
- It should have a consistent, pleasant aroma – yeasty, tangy, perhaps slightly fruity or alcohol-like (but not foul or like nail polish remover).
- It will be visibly bubbly and active throughout.
- (Optional) Float Test: Some bakers test readiness by dropping a small spoonful of peaked starter into a glass of water. If it floats, it’s theoretically full of gas and ready. However, this isn’t always reliable; predictable rising behavior is a better indicator.
Be patient! Environmental factors, flour type, and water quality can all influence the timeline.
Maintaining Your Mature Starter: Keeping it Happy
Once your starter is consistently active and predictable, maintaining it is much simpler and depends on how often you plan to bake.
Baking Frequently (Several Times a Week): Room Temperature Maintenance
If you bake often, keeping your starter on the counter makes it readily available.
- Location: Keep the jar loosely covered on your counter (ideally out of direct sunlight).
- Feeding: Feed it once or twice per day (every 12-24 hours). Most find twice a day keeps it most vigorous.
- Feeding Ratio: A common ratio is 1:1:1 (Starter:Flour:Water by weight). For example, keep about 50g of starter, discard the rest, and feed with 50g flour and 50g water. You can adjust the amounts based on how much active starter (“levain”) your recipes require, always maintaining roughly equal weights of flour and water in the feeding.
Baking Less Frequently (Once a Week or Less): Refrigerator Storage
If you only bake occasionally, the fridge is your friend. Cold temperatures dramatically slow down fermentation, reducing the need for frequent feedings.
- Process: Feed your starter as usual. Let it sit at room temperature for a few hours (2-4 hours) to allow fermentation to become active. Then, secure the lid more tightly (but not completely airtight, some gas might still be produced) and place the jar in the refrigerator.
- Weekly Feeding: Take the starter out of the fridge once a week. Discard most of it (leaving maybe a tablespoon or ~25-50g). Feed this remainder with your standard amount of fresh flour and water (e.g., 50g each). Let it sit at room temperature for a few hours again before returning it to the fridge.
- Preparing for Baking: When you want to bake, plan ahead! Take the required amount of starter out of the fridge 1-2 days before you need to mix your dough. Give it 2-3 feedings at room temperature, roughly 12 hours apart, to “wake it up” fully and ensure it’s back to its vigorous, doubling state before you use it in your recipe.
Understanding Feeding Ratios (e.g., 1:1:1 vs. 1:5:5)
The ratio refers to Starter : Flour : Water by weight.
- A 1:1:1 ratio (equal parts starter, flour, water) provides plenty of food relative to the microbe population, leading to faster fermentation and peaking activity. Good for frequent feeding/baking.
- A higher ratio, like 1:2:2 or 1:5:5 (meaning you use less starter relative to the amount of fresh flour and water), provides less initial microbe density. This slows down fermentation, meaning the starter takes longer to peak and can go longer between feedings. This can be useful for less frequent feeding schedules or managing acidity levels. Experiment to find what works for your schedule and starter.
Troubleshooting Common Starter Issues
Don’t panic if things seem off – most issues are fixable!
- No Activity (Early Stages): Most common issue. Solution: Be patient! Ensure your spot is warm enough (70-77°F / 21-25°C). Use dechlorinated, lukewarm water. Keep feeding consistently once a day. Sometimes trying a different brand of whole grain flour can help kickstart things.
- Hooch Formation (Dark Liquid Layer): A layer of darkish liquid on top. Solution: This means your starter is hungry and has consumed its available food; the liquid is mostly alcohol and water. It’s usually harmless. You can either pour most of it off before discarding and feeding, or stir it back in (this can contribute to a more sour flavor). If you see hooch consistently, it’s a sign you need to feed your starter more frequently or use a higher ratio of fresh flour/water at feeding time.
- Foul Smell (Acetone/Nail Polish Remover, Vomit): Especially common in the first week. Different microbes are battling for dominance. Solution: Usually resolves itself with consistent discarding and feeding (twice a day if possible). Keep going! If the smell persists alongside zero activity after many days, consider starting over.
- Mold (Fuzzy Spots – Pink, Orange, Green, Black): Any sign of fuzzy mold means harmful microbes have taken over. Solution: Discard the entire starter immediately. Do not try to scrape it off. Thoroughly clean and sanitize the jar before starting again. Ensure you are covering the jar adequately (but still allowing gas exchange) and using clean utensils.
- Sluggish Activity (Mature Starter): It’s not rising well after being reliable. Solution: Check temperature – is it too cold? Try a warmer spot. Is your feeding ratio too high (not enough starter left)? Try leaving a bit more starter or using a lower ratio (e.g., 1:1:1) for a couple of feedings. Are you feeding frequently enough? Has your flour or water source changed? Give it a couple of boost feedings (1:1:1, twice a day) in a warm spot.
Patience is a Virtue (and a Key Ingredient)
The most important advice for sourdough beginners is to be patient and observant. Creating life from flour and water takes time. Your starter won’t behave exactly like someone else’s online – it has its own personality based on your unique environment and microbes. Learn to watch for its signs: the way it bubbles, how high it rises after feeding, how quickly it falls, and how it smells at different stages. Consistent care – regular feeding (with discarding!) and a stable warm temperature – is far more important than any complicated trick.
Conclusion: Your Bubbling Baking Companion
Creating and maintaining a sourdough starter might seem like a daunting task reserved for expert bakers, but as we’ve seen, it can be simplified down to a manageable routine. At its core, it’s about providing flour, water, and warmth to cultivate the wild yeasts and bacteria naturally present around us. The process demands patience during the initial creation phase (typically 1-2 weeks) and consistent care afterwards, tailored to how often you bake.
Learn to observe your starter, understand its feeding needs (remembering to discard!), troubleshoot common hiccups, and don’t be discouraged by the initial slow stages or occasional sluggishness. The reward – the unparalleled flavor, texture, and satisfaction of baking bread leavened by your very own, unique sourdough starter – is well worth the gentle effort. With this simplified approach, you’re well on your way to successfully nurturing your own bubbly baking companion. Happy starter keeping!


