There’s immense satisfaction in pulling a beautiful, fragrant loaf of artisan bread from your oven. But let’s be honest, the path to baking mastery isn’t always smooth. Sometimes, despite following a recipe carefully and pouring hours into the process, the result is… underwhelming. Maybe your loaf resembles a dense brick, spread out like a pancake, developed a pale crust, or sports a gummy interior. It’s frustrating, but here’s the good news: every baker encounters these issues, especially when starting out.
These “bread fails” aren’t signs of incompetence; they are valuable learning opportunities. By understanding why a loaf didn’t turn out as expected, you can diagnose the likely cause and make targeted adjustments for your next bake. Most common problems trace back to fundamental principles of ingredient measurement, fermentation management, dough handling, or baking conditions. This guide will serve as your troubleshooting companion, helping you identify frequent artisan bread problems, understand their potential causes, and learn how to fix them, turning disappointment into delicious progress.
Decoding the Disappointment: Common Bread Problems & Causes
Let’s break down some frequent issues based on the symptoms you might see or taste:
Problem: Dense Crumb / Poor Rise / Lack of Oven Spring
- The Symptoms: The loaf feels heavy for its size. The interior crumb is tight, dense, and lacks those desirable airy holes. It didn’t seem to “spring” upwards much during the first few minutes in the oven.
- Potential Causes:
- Improper Proofing (Most Common Culprit):
- Under-proofed: The dough didn’t develop enough CO2 gas before baking, and the gluten structure was still too tight to expand easily. (Did the poke test spring back immediately?).
- Over-proofed: The dough rose too much before baking, weakening the gluten structure so it collapsed when handled or hit the oven heat; the yeast may have also run out of easily accessible food. (Did the poke test indentation stay completely?).
- Inactive or Insufficient Leaven: Your yeast might have been old/dead, or your sourdough starter wasn’t vigorous and active enough when you used it.
- Poor Gluten Development: Insufficient kneading or folding meant the gluten network wasn’t strong enough to trap the gases effectively. Using flour with very low protein content can also contribute.
- Shaping Issues: Handling the dough too roughly during shaping can excessively degas it. Conversely, not creating enough surface tension can lead to spreading instead of rising.
- Scoring Problems: Scoring too deeply can deflate the dough. Scoring too shallowly (or not at all) can restrict the loaf’s ability to expand upwards, forcing bursts elsewhere or limiting overall volume.
- Insufficient Oven Heat: The oven or baking surface (stone/steel/Dutch oven) wasn’t preheated thoroughly enough to provide the initial thermal shock needed for rapid gas expansion (oven spring).
- Lack of Steam: If the crust formed too quickly due to lack of steam in the initial baking phase, it physically restricted the loaf’s ability to rise.
- Improper Proofing (Most Common Culprit):
- Solutions / Next Time:
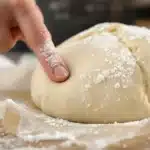
- Master Proofing: Learn to accurately gauge the end of bulk fermentation and especially the final proof using visual cues and the poke test. Don’t rely solely on time.
- Check Your Leaven: Ensure your commercial yeast is fresh. Test active dry yeast by proofing it. Feed your sourdough starter regularly and use it when it’s predictably active and bubbly (usually near its peak rise).
- Develop Gluten Appropriately: Knead or fold sufficiently based on your dough type and hydration.
- Shape with Purpose: Be gentle but firm, aiming to create good surface tension without completely flattening the dough.
- Score Correctly: Use a sharp blade, score immediately before baking, and aim for the right depth and angle.
- Preheat Thoroughly: Ensure your oven AND baking surface are fully preheated for at least 30-60 minutes. Use an oven thermometer.
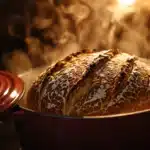
- Ensure Adequate Steam: Use a Dutch oven or an effective alternative steam method for the first 15-25 minutes of baking lean doughs.
Problem: Pale Crust
- The Symptoms: The bread is cooked through (checked with a thermometer), but the crust remains stubbornly light golden or pale, lacking that rich, deep brown color.
- Potential Causes:
- Oven Temperature Too Low: Your oven’s actual temperature might be lower than the dial setting. (Use that oven thermometer!). Or the recipe temp itself might be too low for good browning.
- Baking Time Too Short: You might simply need to bake the loaf for longer, especially during the uncovered phase when browning occurs.
- Over-proofed Dough: If the yeast consumed nearly all the available simple sugars on the dough’s surface during an overly long proof, there’s less sugar left to participate in Maillard reactions and caramelization, resulting in paleness.
- Too Much Steam / Insufficient Venting: If steam is present for too long (e.g., lid left on the Dutch oven, steam pan not removed), it keeps the surface moist and inhibits the browning reactions.
- Excessive Flour Dusting: A thick layer of flour dusted on the loaf before baking acts as an insulator and barrier, preventing the crust underneath from browning properly.
- Solutions / Next Time:
- Verify Oven Temperature: Use an oven thermometer and adjust accordingly.
- Bake for Color: Don’t be afraid to bake your loaves until they are deeply browned! Color equals flavor. Trust the internal temperature for doneness, then bake longer for crust color if needed.
- Refine Proofing: Aim for perfectly proofed dough, avoiding excessive over-proofing.
- Vent Steam Properly: Ensure you remove the lid or steam source at the appropriate time (usually after 15-25 minutes) to allow the crust to dry and brown.
- Dust Lightly: If dusting flour for appearance or handling, use a very light touch or brush off excess before baking.
Problem: Burnt or Overly Dark Crust (Especially Bottom)
- The Symptoms: The crust, particularly the bottom, gets burnt or excessively dark before the inside of the loaf is fully cooked.
- Potential Causes:
- Oven Temperature Too High: Your oven is running hotter than the dial indicates. (Again, use an oven thermometer!).
- Baking Surface Too Close to Heat Source: Your baking stone, steel, or Dutch oven might be positioned too close to the bottom heating element.
- Baked Too Long: Especially at a high temperature.
- Dark Bakeware: Using dark metal pans (if not baking hearth-style) absorbs more heat, leading to faster bottom browning.
- High Sugar/Fat Content: Enriched doughs naturally brown faster due to the extra sugars and fats.
- Solutions / Next Time:
- Calibrate Oven Setting: Use your oven thermometer to set the correct temperature.
- Adjust Rack Position: Move the oven rack (with your stone/steel/Dutch oven) up one level away from the bottom element.
- Insulate the Bottom: Place an empty baking sheet or a layer of foil on the rack below your primary baking surface partway through the bake to deflect some direct bottom heat if needed.
- Monitor Closely & Use Internal Temp: Check the internal temperature to gauge doneness rather than just relying on time or crust color alone. Reduce baking time if necessary.
- Adjust for Enrichments: Consider slightly lowering the baking temperature for highly enriched doughs prone to burning.
Problem: Misshapen Loaf / Spreading Outwards (“Flying Saucer”)
- The Symptoms: Instead of rising proudly upwards, the loaf spreads sideways during proofing or baking, resulting in a flatter, wider loaf.
- Potential Causes:
- Under-developed Gluten: The dough simply lacked the internal structure strength to hold its shape against gravity and gas expansion.
- Over-proofing: The gluten network became weak and started to degrade, unable to support the loaf’s structure.
- Poor Shaping / Lack of Surface Tension: Insufficient tension was created during shaping, allowing the dough to relax and spread outwards too easily.
- Hydration Too High for Handling Skill: While high hydration promotes open crumb, if the dough is too wet for your current shaping ability or lacks sufficient gluten strength, it will naturally spread more.
- Scoring Issues: Scoring too late, too deeply, or with too many cuts on an already fragile over-proofed loaf can cause it to collapse and spread.
- Rough Transfer: Jarring or dropping the proofed dough when transferring it to the oven can cause it to partially deflate and lose shape.
- Solutions / Next Time:
- Focus on Gluten Development: Ensure sufficient kneading or folding for your dough type.
- Nail the Proofing: Avoid significant over-proofing using the poke test.
- Practice Shaping: Work on techniques that build good surface tension (refer back to Shaping School).
- Manage Hydration: If struggling, try slightly lowering the hydration percentage until your handling skills improve. Ensure high-hydration doughs have support during proofing (banneton/lined bowl) and consider cold proofing for easier handling.
- Score Appropriately: Score confidently just before baking, adjusting depth based on proof level.
- Handle Gently: Transfer the proofed loaf to the oven smoothly and carefully.
Problem: Gummy or Dense Interior Crumb
- The Symptoms: Even if the loaf rose okay, the inside texture is damp, dense, slightly rubbery, or sticky when sliced.
- Potential Causes:
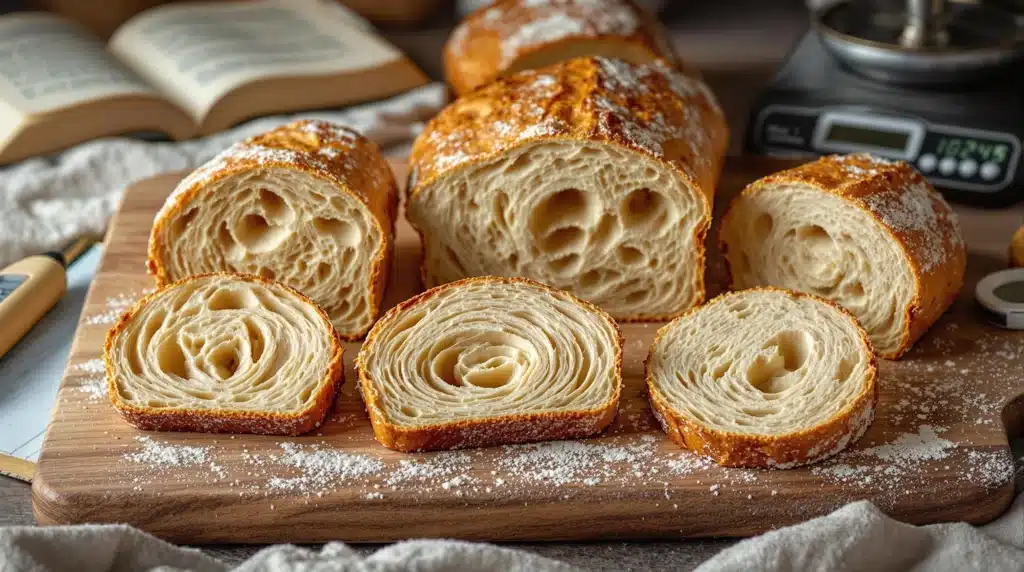
- Cutting While Too Hot (Most Common Culprit!): Slicing into bread before it has cooled completely (at least 1-2 hours on a wire rack) is the number one cause of gumminess. The steam inside needs to dissipate, and the starches need time to set and retrograde (firm up) as it cools. Cutting too soon halts this process.
- Under-baking: The interior simply didn’t reach a high enough temperature for long enough to fully cook the starches and set the proteins.
- Inaccurate Measurements: Significantly too much liquid or not enough flour in the initial mix. (Use your scale!).
- Issues with Leaven: An immature or sluggish starter, or inactive yeast, might lead to poor internal structure development even if some rise occurs.
- Solutions / Next Time:
- PATIENCE! Let it Cool COMPLETELY: This is critical. Cool fully on a wire rack before slicing. The texture transformation during cooling is significant.
- Verify Doneness with Thermometer: Use an instant-read thermometer to ensure the center reaches the target internal temperature (e.g., 190-210°F / 88-99°C for lean breads).
- Measure Accurately: Use a scale for flour and liquids.
- Ensure Healthy Leaven: Use active, vigorous starter or fresh yeast.
Problem: Flavor Issues (Too Sour, Bland, Off-Flavors)
- The Symptoms: The bread just doesn’t taste right.
- Potential Causes:
- Too Sour (Sourdough): Often from over-proofing (especially at warm temperatures, favoring acid production) or maintaining the starter in a way that promotes high acidity (infrequent feeding, warm storage). Using too high a percentage of starter in the dough can also contribute.
- Bland Flavor: Usually indicates under-developed fermentation (proofed too quickly, not enough time for flavor compounds to build). Also caused by insufficient salt or using only refined white flour without the complexity of whole grains or pre-ferments.
- Unpleasant Off-Flavors (Alcoholic, Acetone-like): Can occur with extreme over-proofing or issues with starter health (imbalance of microbes, feeding issues).
- Solutions / Next Time:
- Adjust Fermentation: For less sourness, shorten proofing or use slightly cooler temps, feed starter more frequently. For more complexity (if bland), use longer, cooler fermentation (retardation), ensure adequate salt, incorporate pre-ferments or whole grains.
- Starter Management: Adjust starter feeding ratios and schedule to manage acidity.
- Troubleshoot Starter: If off-flavors persist, review starter feeding practices or consider refreshing/rebuilding it.
Problem: Very Large, Irregular Holes / Tunnels (“Baker’s Caves”)
- The Symptoms: While an open crumb is often desired, these are excessively large, disruptive holes or tunnels, often surrounded by denser areas.
- Potential Causes:
- Trapped Flour During Shaping: Pockets of dry flour folded into the dough prevent layers from sticking together, creating voids.
- Insufficient Gentle Degassing During Shaping: Failure to gently press out the very largest gas bubbles before the final proof can allow them to expand excessively.
- Under-developed Dough: A weak gluten structure might tear unevenly around large gas bubbles.
- Uneven Fermentation / Proofing Issues: Sometimes related to temperature inconsistencies or starter activity.
- Solutions / Next Time:
- Use Minimal Flour During Shaping: Be mindful not to incorporate pockets of dry flour when folding. Brush off excess flour.
- Gentle Degassing: When shaping, gently pat or press the dough to expel only the most obvious, oversized bubbles.
- Ensure Proper Gluten Development: Knead or fold sufficiently for your dough type.
- Promote Even Fermentation: Use consistent proofing temperatures.
Learning from Mistakes: The Baker’s Mindset
Encountering problems isn’t failure; it’s data collection!
- Don’t Be Discouraged: It happens to everyone. Baking involves many variables.
- Analyze Systematically: Look at the symptoms. What do they suggest based on the principles of fermentation, hydration, heat, etc.? What stage likely went wrong?
- Change One Thing: When troubleshooting, resist the urge to change multiple variables at once. Alter just one key factor (e.g., adjust only the final proof time, or only the hydration) on your next attempt so you can clearly see the impact of that specific change.
- Take Notes: Keep a simple baking journal. Record your process (times, temps, key observations about the dough’s feel) and the results (crumb, crust, flavor, photos!). This creates an invaluable resource for diagnosing future issues and tracking progress.
Conclusion: From Fail to Fix
Troubleshooting is an inherent part of the baking process. Even experienced bakers have off days or encounter unexpected results. By learning to recognize common bread fails and understanding their likely root causes – often tied back to the fundamentals of measurement, fermentation, temperature control, shaping, or scoring – you can approach these challenges systematically rather than with frustration.
Use this guide as a starting point for diagnosing your loaves. Refer back to the basic principles we’ve covered. Be patient with yourself, observe your dough closely, take good notes, and remember that every bake, successful or not, teaches you something valuable. By viewing “fails” as fixable problems and learning opportunities, you’ll steadily build the skills and intuition needed to consistently bake truly delicious artisan bread.